Rebuilding a heater box is hopefully something you'll only have to do once. For that one time you choose to complete it, do it right.
Begin with the correct heater box for your make, model and year. This one will fit a 1968-1970 B-Body Mopar, in this case, a Dodge Charger WITH AIR CONDITIONING.
There is a big difference between an A/C box and one without A/C. They are not interchangeable.
 |
1970 B-Body heater box as purchased used from an online seller. The lip is typically folded over but the seller had already had this unit apart and didn't bother to re-fold the seam. It will need a little flattening to get it to seal up and fold over properly.
|
 | |
| Close-up of bottom of linkage system and vacuum actuator. Taking pictures before you begin the re-build will help you put it back together again...correctly. |
 |
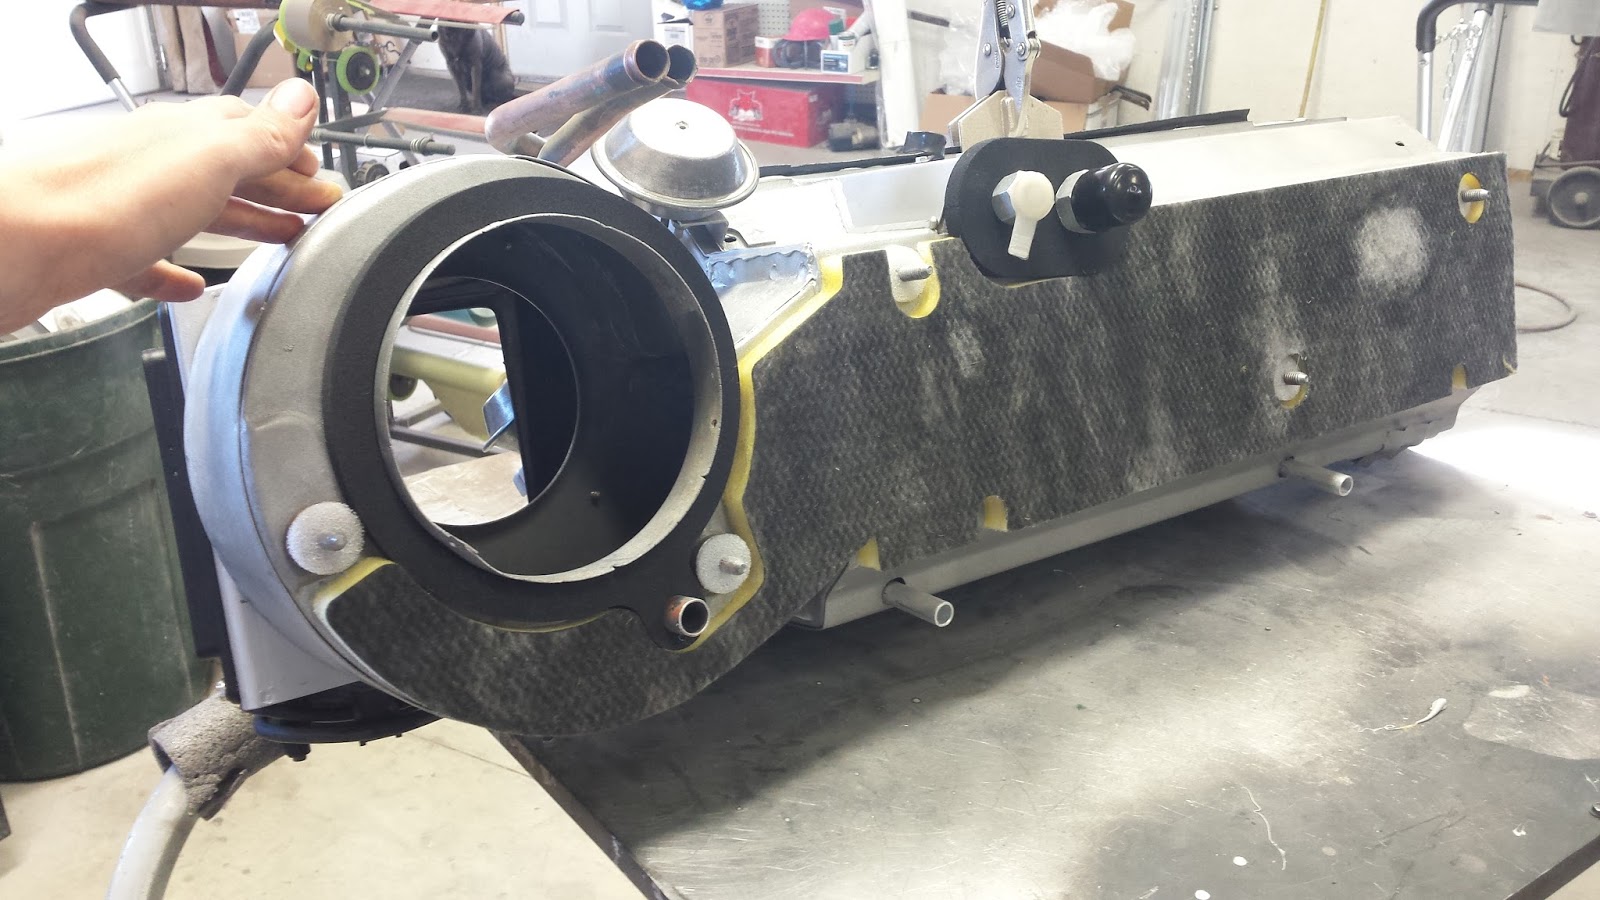
| 1970 Charger Heater box, side view. Most of the hardware is 1/4". |
 |
| 1970 B-Body Mopar Heater Box Linkage and vacuum |
 |
| This box has some rust from previously leaky and smashed lines but it's still solid and restore-able. we will clean the whole box, then sand the exterior to a final grit of 320, then prime and paint |
 |
| Back view after removing insulation from the heater box |
 |
| Close up view of linkage assembly and the hardware being removed to begin dis-assembly of the box. We removed the linkage in one big piece to ensure we could clean it while keeping it in the correct configuration. |
 |
| The heater box is apart with the heater core on the left and the A/C condenser on the right. Both items will be replaced. most of the seals are already falling off or missing from the inside of this box and the rodents were making large nests in the insulation |
 |
| Sleeves are removed from the copper tubes |
 |
| This heater box had a lot of mouse damage and some corrosion of the tubes. Most of the seam sealer on the inside of the A/C portion of the box was flaking off and will be replaced before re-painting. A run through a parts cleaner solution or a spray with Brakleen will remove a large portion of the grime from all parts of the box. |
 |
In order to replace the seals on the vent flap, we had to unfold the clips. This may take some effort. A narrow blade screw driver and a hammer will help get the lips lifted, then fold them over with a pliers.
NOTE: the insulation kit DOES NOT come with the rubber seal for under the black strip that holds the vent door. We made our own out of seals we had on hand. | | |
|
 |
| Internal linkage assembly will be cleaned. The flaps will be painted but the rods will be cleaned and left natural so ensure they operate properly. |
 |
| Rods, flaps and linkage system are disassembled and ready for cleaning and paint. We'll use steel wool on the vacuum parts and rods, linkage and small hardware will be placed in parts cleaner. We were missing some of the old old hardware and had to replace it. The hardware kit from Classic Industries does NOT include many of the harder to find nuts, springs or cotter pins. 1 cotter pin came with the seal kit from Detroit Muscle Technologies |
 |
| Repainted to match the satin black used for the interior parts on the 1970 Dodge Charger this box will be going into. |
 |
| Re-painted to mimic the galvanized finish |
 |
| Steel wool works wonders on vacuum parts! |
 |
| Spray adhesive, new hardware, basic instructions and insulation("big" insulation kit from Detroit Muscle Technologies), new heater bypass valve, a/c evaporator and heater core are all being used in this heater box restoration |
 |
3M Spray adhesive is used to secure the insulation.
No modifications were needed to make the insulation parts fit from the kit. |
 |
| Insulation installation in progress |
 |
| Insulation installation in progress |
 |
| Insulation installation in progress |
 |
| Heater Core and A/C Evaporator are in place. Notice the seals and white caulk placed on the heater core in preparation for sealing up the box. The replacement condenser is a VERY tight fit in this box because a few of the lines on the side of the part stick out a bit farther than the original one. The heater core and A/C condenser were both purchased from Classic Industries. Using clamps and a second pair of hands makes closing up the box a much faster process. |
 |
| Check fit, and seals, and flap operations before closing up the box. We left the linkage and rods unpainted to ensure proper long term operation. They were not painted on the original box. |
 |
| Box is assembled and hardware is in place. The lip will only be folded over to seal the box after we're happy with final inspection |
 |
| Box is assembled and ready for linkage installation |
 |
| Cleaned linkage and vacuum system are in place and working well. |
 |
| Firewall tube seals are in place |
 |
| Firewall insulation is glued to the back of the heater box. |
The Final product will not only appear correct for the car, it will smell better after removing all traces of mice, the linkage will operate smoothly, and the vent doors will seal properly. This heater box is ready for installation
See the final before and after photos below:
 |
| 1970 Mopar B-Body heater box with a/c before restoration(front) |
 |
| 1970 B-Body Mopar heater box with a/c after restoration (front) |
 |
| 1970 Mopar B-body heater Box with A/C before restoration (back) |
 |
| 1970 B-body Mopar heater box with a/c after restoration(back) |
Thank you for visiting our blog!
Follow us on Facebook to see our current projects !


How much does it cost to rebuild one..
ReplyDeleteDepends entirely on how much you're doing yourself and if you need a new condensor and heater core. Complete rebuild and locating all the missing parts for this box(requiring the purchase of 2 extra donor boxes for vents etc) was over $1500 with labor.
DeleteWhat did you do or use to seal heater tubes to heater core? Seams like a potential leak area if not done right.
ReplyDelete