Showing posts with label Mopar. Show all posts

November 15, 2021

Rallye Gauge Replacement 1970 B-Body Mopar

1970 Rallye Gauge Rebuild with Tic Toc Tach

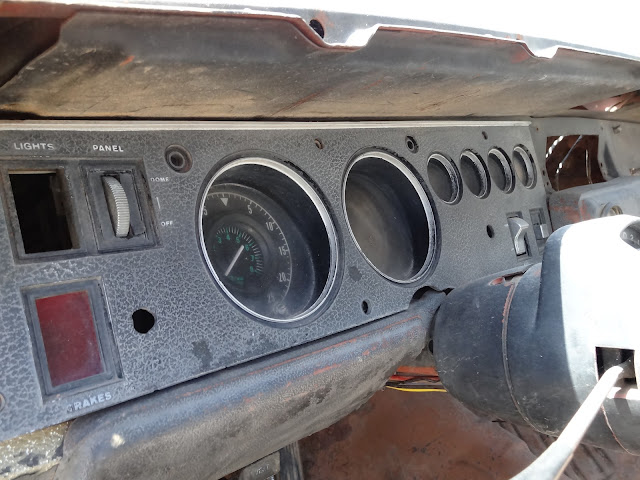
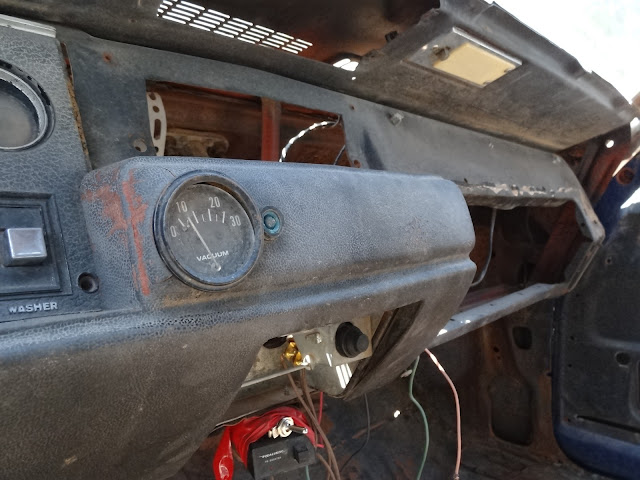
While we typically try to restore and re-use original parts, replacing the gauges and gauge face parts on this 1970 Dodge Charger R/T was a necessary upgrade. None of the gauges were operating or in restorable condition, including the tick toc tachometer. The dimmer switch was non-functional and there was an assortment of  "custom" additions to the dash area (random toggle switch and button anyone?) and critical deletions...like no heater box, radio, light switch, faceplate, glove box etc. Needless to say it was a mess. 
1970_Charger_Dash

1970_Charger_Center_Dash

In this case we removed the entire dash, steering column wiring and everything associated with the firewall as the car was undergoing a complete restoration. This makes it much easier to get the gauge cluster out. You can remove  the whole cluster from the front of the dash if you need, to but we'd recommend masking off the painted areas and dropping the steering column. Small hands help reach all the connections too!
1970_BBody_Gauge_Cluster
Continue reading to view the process...

November 7, 2018

From Modest Driver to Mopar Dream Car: Building the 1970 Charger R/T 440

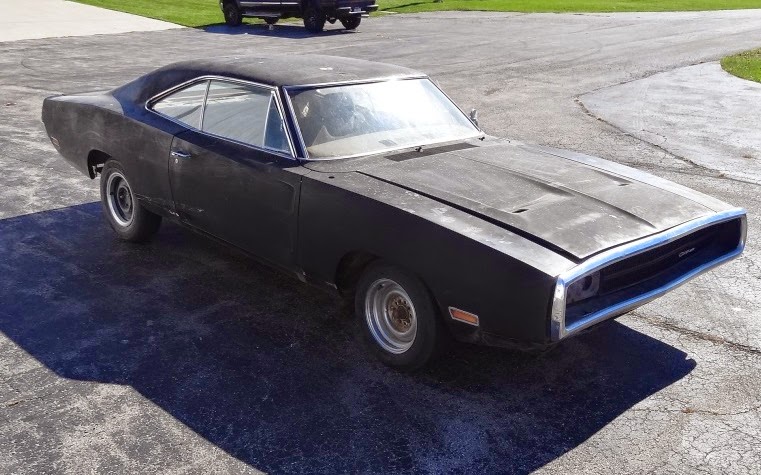
This 1970 Dodge Charger 500 parts car with a barely running 318 under the hood and a van seat for an interior, arrived at Driven Restorations to be re-born as a "Plum Crazy Purple" R/T 440-6

 October, 2014

1970 Mopar Charger
1970 Charger arrived at Driven Restorations LLC
✯The Dream✯
This project started as a harmless conversation after we met the owner at an unrelated networking event. We said "classic cars", they said "Plum Crazy 70 Charger" and before you could say "R/T" the wheels were spinning and a build plan was in the works.

It took months to locate a '70 Charger within a day's drive of WI, needless to say there weren't very many Plum Crazy 440-6 Mopar's on the market. So when the owner's found a Charger in Arkansas, they moved quickly to get their shot at starting a MAJOR Mopar transformation. 


How major? 


The highlights include 318c.i. to 440 6-pack. Column shift to floor shift. Bare interior (with a van cargo seat) to an original interior with Leather bucket seats, console, A/C, and tic tock tach. Flat black 500 SE to Plum Crazy R/T package complete with a Dana 60 rear axle and black vinyl top
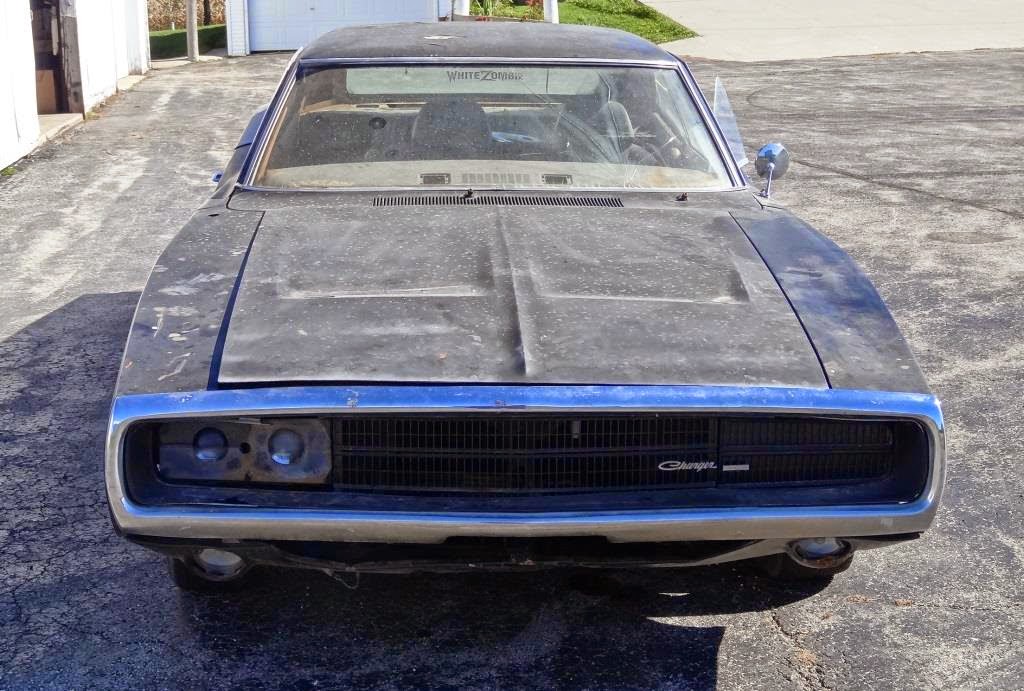
1970 Charger grill
1970 Charger 500 with a 318

December 12, 2016

Mopar Metal Repair 1970 Road Runner

Every once in awhile we stumble across an "original" car, which isn't quite as un-molested as we were led to believe. Unfortunately this very low mileage B-body Mopar had some hidden history despite rarely seeing the road. 
The owner of this 1970 Plymouth Road Runner did in fact know about the previous repairs in the lower quarters, however, the rocker panel was a surprise. 1" of mud is NOT how to repair major damage. Ever. No excuses. Here we take you step by step through the repair process, to correct a horrendous repair job done several years ago. 
1970_roadrunner
1970 Plymouth Road Runner being mechanically stripped of all paint
The work is just getting started. Continue reading...

March 30, 2016

1968-1970 B-Body Mopar Windshield Replacement

1970 Road Runner
1968-1970 B-Body Mopar Windshield replacement

In the event that you have to replace your windshield on your 1968-1970 B-body Mopar, you need to know what you're getting into before getting started. This is a step by step guide to the process of replacing or removing and reinstalling the original glass. 
In our example, this 1970 Plymouth Road Runner was receiving a complete paint job with interior and exterior color change. To paint a car properly, the windshield must be removed. 
Read on for our step by step process of handling the windshield. 

1970_mopar_bbody
BEFORE: This 1970 Roadrunner will receive a complete interior and exterior color change and the vinyl top will be eliminated

Mopar_vinyl_top
Before: Existing trim and glass


1. Remove the existing stainless trim around the windshield. Careful not to bend or crease your trim, look at the clip type and location(more photos later in this post), and use a clip removal tool (looks like a forked pry bar in most cases) suitable for your application.

2. Remove the windshield gasket and glass. It is likely that you will need to cut the rubber weatherstripping gasket that is holding the glass in place to remove the glass without breaking it. There are a variety of tools made for this purpose which will allow you to cut the gasket without gouging your windshield. 
NOTE- Save any and all clips that are screwed into the body of the car which hold the trim in place. You will need these or their replacements. 

November 23, 2015

1968-1970 B-body Mopar Heater Box with A/C Rebuild

Rebuilding a heater box is hopefully something you'll only have to do once. For that one time you choose to complete it, do it right.


Begin with the correct heater box for your make, model and year. This one will fit a 1968-1970 B-Body Mopar, in this case, a Dodge Charger WITH AIR CONDITIONING. 
There is a big difference between an A/C box and one without A/C. They are not interchangeable.
1970_b_body_mopar_heater_box
1970 B-Body heater box as purchased used from an online seller. The lip is typically folded over but the seller had already had this unit apart and didn't bother to re-fold the seam. It will need a little flattening to get it to seal up and fold over properly.


Mopar_heater_box_vacuum
Close-up of bottom of linkage system and vacuum actuator. Taking pictures before you begin the re-build will help you put it back together again...correctly.

1970_Dodge_charger_heater_box
1970 Charger Heater box, side view. Most of the hardware is 1/4".

June 14, 2015

For the Love of Mopar

It's "Mopar or no car"

1969_dodge_Charger_Mopar
1969 Dodge Charger

This 1969 Dodge Charger can snap your head back as it launches down the quarter mile, drown out conversation with open headers, or quietly join the area car cruises. The owner of this car is a die hard Mopar man and has found ways to enjoy his car to fullest for the decades that he's owned it.

June 10, 2014

Mopar Window Repair/Replacements: 1970 B-Body

 If you need to replace the weather stripping or seals on your windows in a 1970 B-Body Mopar, and you're wondering how in the world the vent window fits back in the door properly, there is little hidden trick.

 There is a screw behind the rubber on the vertical vent window channel. When the screw is removed, you can pull the vertical piece of the vent window outward, just enough, after the whole assembly is in the door, to allow for installation of the door glass and glass guides.  See photos below.

1. All glass and trim removed from the car. The vent widow was cleaned and inspected.  This car, a 1970 Roadrunner, received all new glass channel run, felt, glass guides, hardware, and weatherstrip. You will need a phillips head screwdriver and likely PBR or WD40 to get the screw to loosen.

May 21, 2014

1970 Road Runner: Mopar Makeover


1970_roadrunner
1970 Road Runner (Before)
This 1970 Mopar arrived at the shop with 90% original parts and featured a mere 38,000 original miles. While that is often considered desirable, the lack of updated parts(such as spark plug wires) left this Plymouth Road runner with a rough idle and in dire need of maintenance.

After closer inspections it became obvious that the blue on blue Road Runner was also in need of a face lift. Although there is something to be said for an all original time capsule, she needed some attention...