Vinyl Top Installation on a 1970 Nova SS
Step by Step Photos and Descriptions
Vinyl top installation doesn't have to be intimidating. Following a few basic
steps and using the correct tools and materials can yield long lasting, show
winning results like the one shown on this 1970 Nova SS.

|
|
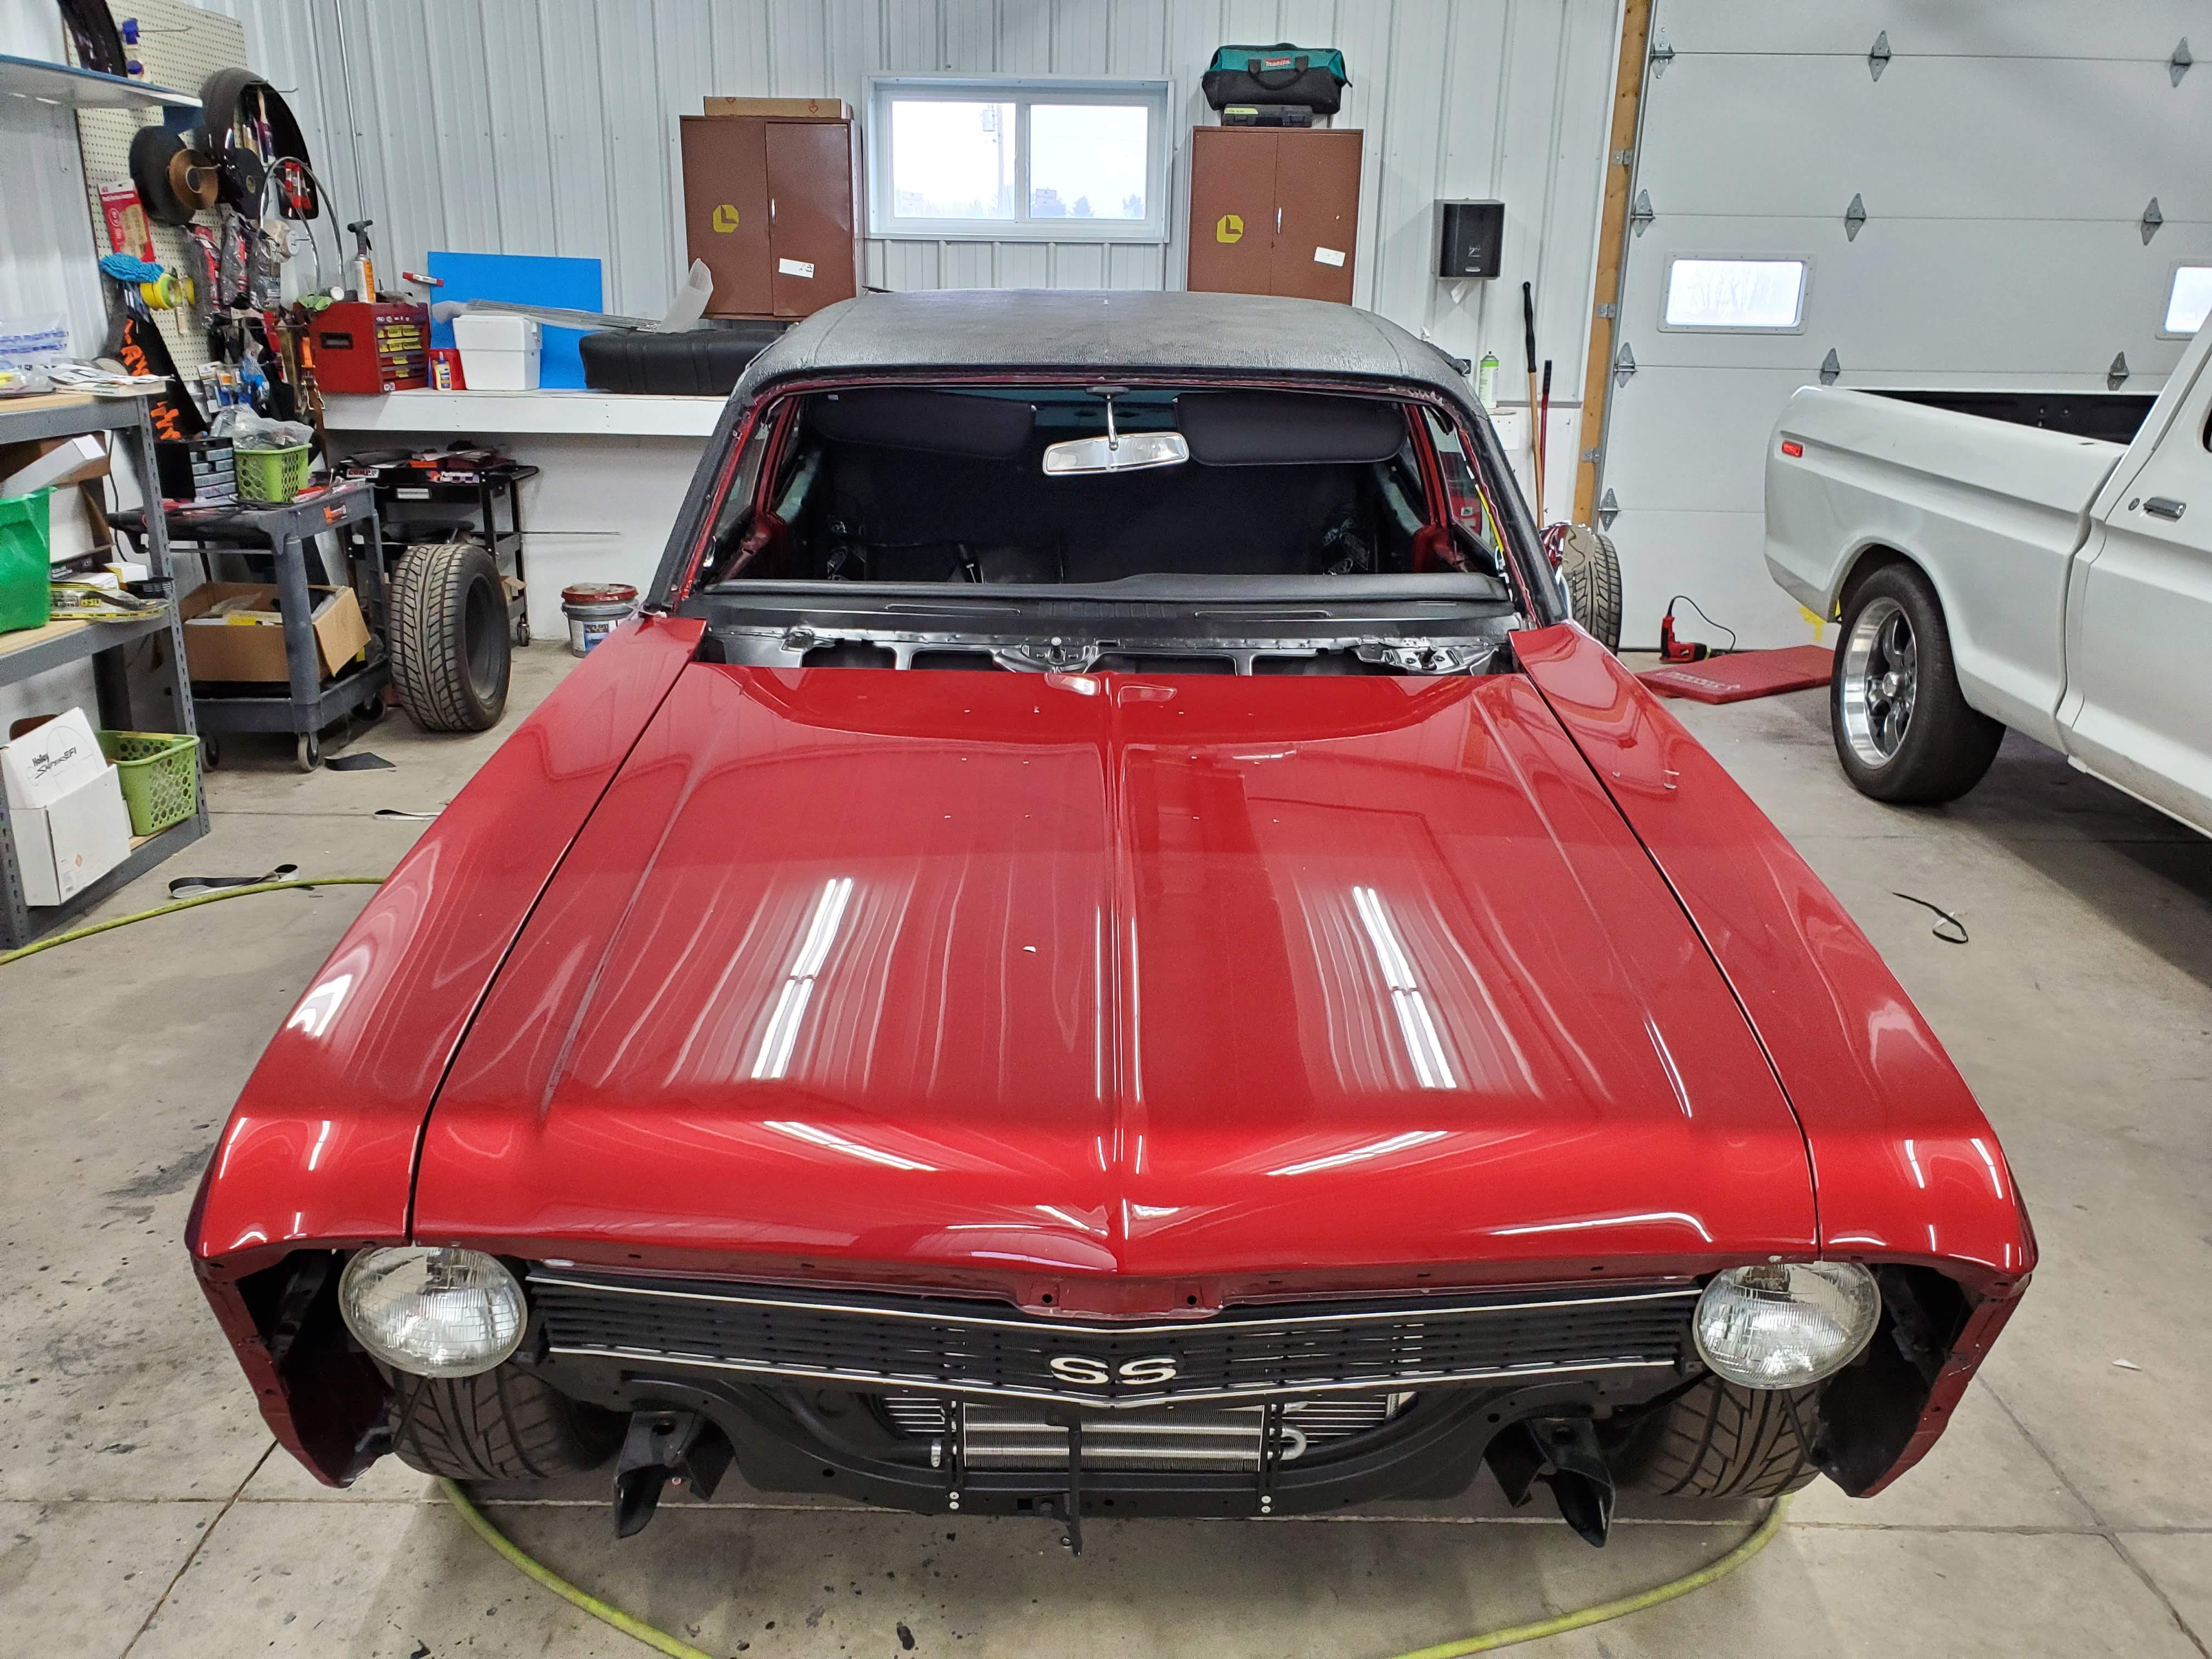
1970 Nova SS with black vinyl top
|

|
| Freshly painted 1970 "4th Quarter Nova" SS |
Depending on your situation you may be replacing a top or installing a new one after fresh paint(we should all be so lucky!). In this example, all the glass was already out of the car because we just finished metal, body and paint work on this restorations. To properly install a vinyl top, all top trim, drip rail moldings as well as front and rear glass and related trim clips should be removed.

|
|
Vinyl tops arrive tightly folded in a box. It will need to "relax" before installation. |
Notice the extra material at all edges? Be sure you have a quality set of shears to cut the vinyl when it's time to trim, but before you start cutting proper test fitting and alignment is ESSENTIAL! Nothing worse than a vinyl top cut too short!
SURFACE PREPARATION FOR TOP INSTALLATION
Freshly painted: If you're as lucky as we were with this Nova, you may have a freshly painted surface to start with. To prep the roof, sail panels and A-pillars for gluing the top any grit from 220-320 should work well. When done sanding, blow off the residue with an air hose and clean well with wax & grease remover or glass cleaner.
We know, it's not always this easy to prep for a new top!
Removing and replacing an old top: If you removed an old top you'll be left with a lot of old adhesive and possibly some rust damage. ALL old adhesive should be removed and any repairs need to be completed before the new top, otherwise you may end up with a very leaky top with a lot of bubbles that will release the first time you try to drive the car. The good news is that the old glue will likely be hardened so, if you're lucky, you can sand it off with a DA, being careful not to go to far into the paint. There are cases where the previous installer used the wrong glue (Super 77 or similar non-heat stable aerosol). In these situation you will be stuck with spending a lot of time using adhesive remover to clean it all off.
 |
For proper adhesion the clear coat on the roof will need to be prepped with sandpaper.
|

|
|
Using chalk, mark the center line of your vinyl top based on
measurements of YOUR car. Do not trust the fold! Some brands will
have the center line notched so you will only need to find center on
your roof line using Truler's or a flexible measuring tape.
|

|
|
Begin trimming, leaving a generous edge. Pie cuts at the corners
will help you mock it up and set the position. The pie cuts shown
here are for fit only as they help the material lay correctly for fit, they will mostly be trimmed off and re-cut
when ready to glue.
|
TOOLS AND MATERIALS
Proper tools and materials are a life saver for vinyl top
installation. We recommend having the following list of items ready to go
before you begin:
- 3M Contact Cement (product number 1357)
-
Siphon feed paint gun
- Masking paper and masking tape
-
Rubber rollers, 2-3" wide (wider rollers won't give enough pressure on
contact points to smooth out the top)
- Fabric shears
- Razor blades
-
Rubber "pusher" to push vinyl top into drip rail gutter without damaging
the vinyl
- Lacquer thinner to clean paint gun
-
Adhesive remover or Acrysol to remove unwanted adhesive on painted or
other surfaces
- Trim clips and related hardware
- All stainless or chrome trim( be sure it's clean and free of damage which may prevent proper fit)
 |
| Rollers come in many styles, rubber rollers are best as they wont mar the vinyl. Be sure the rubber is clean and free of dirt or debris before you roll the top. |
 |
| Spray application tool and material |

|
This is what the 3M Contact cement looks like after mixing with a stir
stick. It is advised NOT to shake the can. Open the lid and scrape the
bottom of the can with a stir stick and using a "egg whisking" motion
mix the residue at the bottom of the can into the liquid part until it
is uniform and free of build up.
|
 |
| Fabric shears and razor blades are the best option for cutting the top material |
 The icing on the cake needs to be ready to install so plan in advance! Drip rail moldings have a tendency to get very mangled when removed and will not hold to the drip rail properly if not shaped right. Be sure to repair or re-chrome/polish pitted or damaged pieces as needed. As another note, BEWARE of aftermarket drip rail moldings!!!!!! The fit is often so far off that it may not even hold and can really ruin the look of the car and in some cases ruin the top!
STEPS TO INSTALL YOUR VINYL TOP
Once the top is laid out and marked, tape 1/2 of it to prevent shifting when gluing the first half of the top. An extra set of hands is very helpful at this stage.
 |
| Marked out, centered and taped to prevent movement during glue application the top is ready to glue. |
~Fold the vinyl to the 1/2 way point, being sure to lay it flat over itself with the felt on the bottom clean. Stir the contact cement and place it in the cup for spray on application.
*BEFORE SPRAYING: Check the spray pattern and test spray in a trash can or on a piece of masking paper. Apply the adhesive to the top of the car AND the bottom of the vinyl top from center to about 6" above the drip rail.
*It is highly recommended to work in a well ventilated area when working with glue
 |
| Apply glue from center up to 6-8" from the drip rail on the roof only. Wait until the top of the roof is secured and rolled before you glue the sail panels or A-Pillars. |
~ Once the glue is applied to the top and roof, you have about 10-15 minutes(varies with temp and humidity) to wait for it to "tack off". The glue should NOT be wet to the touch when you fold the vinyl over to adhere it to the roof of the car
 |
| The glue is tacking off and is still slightly stringy so we waited another couple minutes. If you try to glue it while wet vapors will become trapped under the vinyl and will result in bubbling and failed adhesion. |
~Working from center to edges lay the vinyl top on the roof of the car. Be sure no slack is left allowing air to be trapped but also do not pull or you may stretch the material too far and cause puckering. Using the rollers with firm pressure (not angry crazy pushing like Steve appears to be doing LOL) roll the vinyl from center to edges to remove any trapped air and promote adhesion.
 |
| Roll out the vinyl top from center to edge using firm pressure...not angry mad pressure like Steve! LOL |
~Once both halves of the top of the roof are glued and rolled, mask off the vinyl top to prevent excessive cleaning from overspray and unfold the last portion of the top material as shown below. Apply glue, tack off, lay top and roll
 |
| Outer edges of the top ready for glue application |
 |
| Glue applied, tacking off, almost ready to roll. A-pillar is not yet glued. Sail panel does have glue to approximately 1" above trim line |
 |
| Glue applied to the Nova sail panel |
 |
| Smoothing and applying the vinyl to the sail panel should result in a pucker free, smooth finish |
 |
| Pie cuts around corners and trim areas are essential for proper top fit and allowing for trim installation |
~Once the sail panel and window openings are secured, move to the a-pillar and repeat the steps
 |
| A-Pillars and sail panels should be glued LAST. Additional glue can be applied with a brush around window openings and edges near trim to ensure it's sealed and secured. |
 |
| A-Pillar should fit tight and tuck under body line at bottom of the pillar to be secured by the windshield trim on this particular application |
 |
| Trim the vinyl around the clip studs to ensure the clips will fit properly allowing the trim to align around the windshield |
~Now that the top is installed and trimmed around the trim clip studs, the clips can be installed and front and back glass can be set in place.
 |
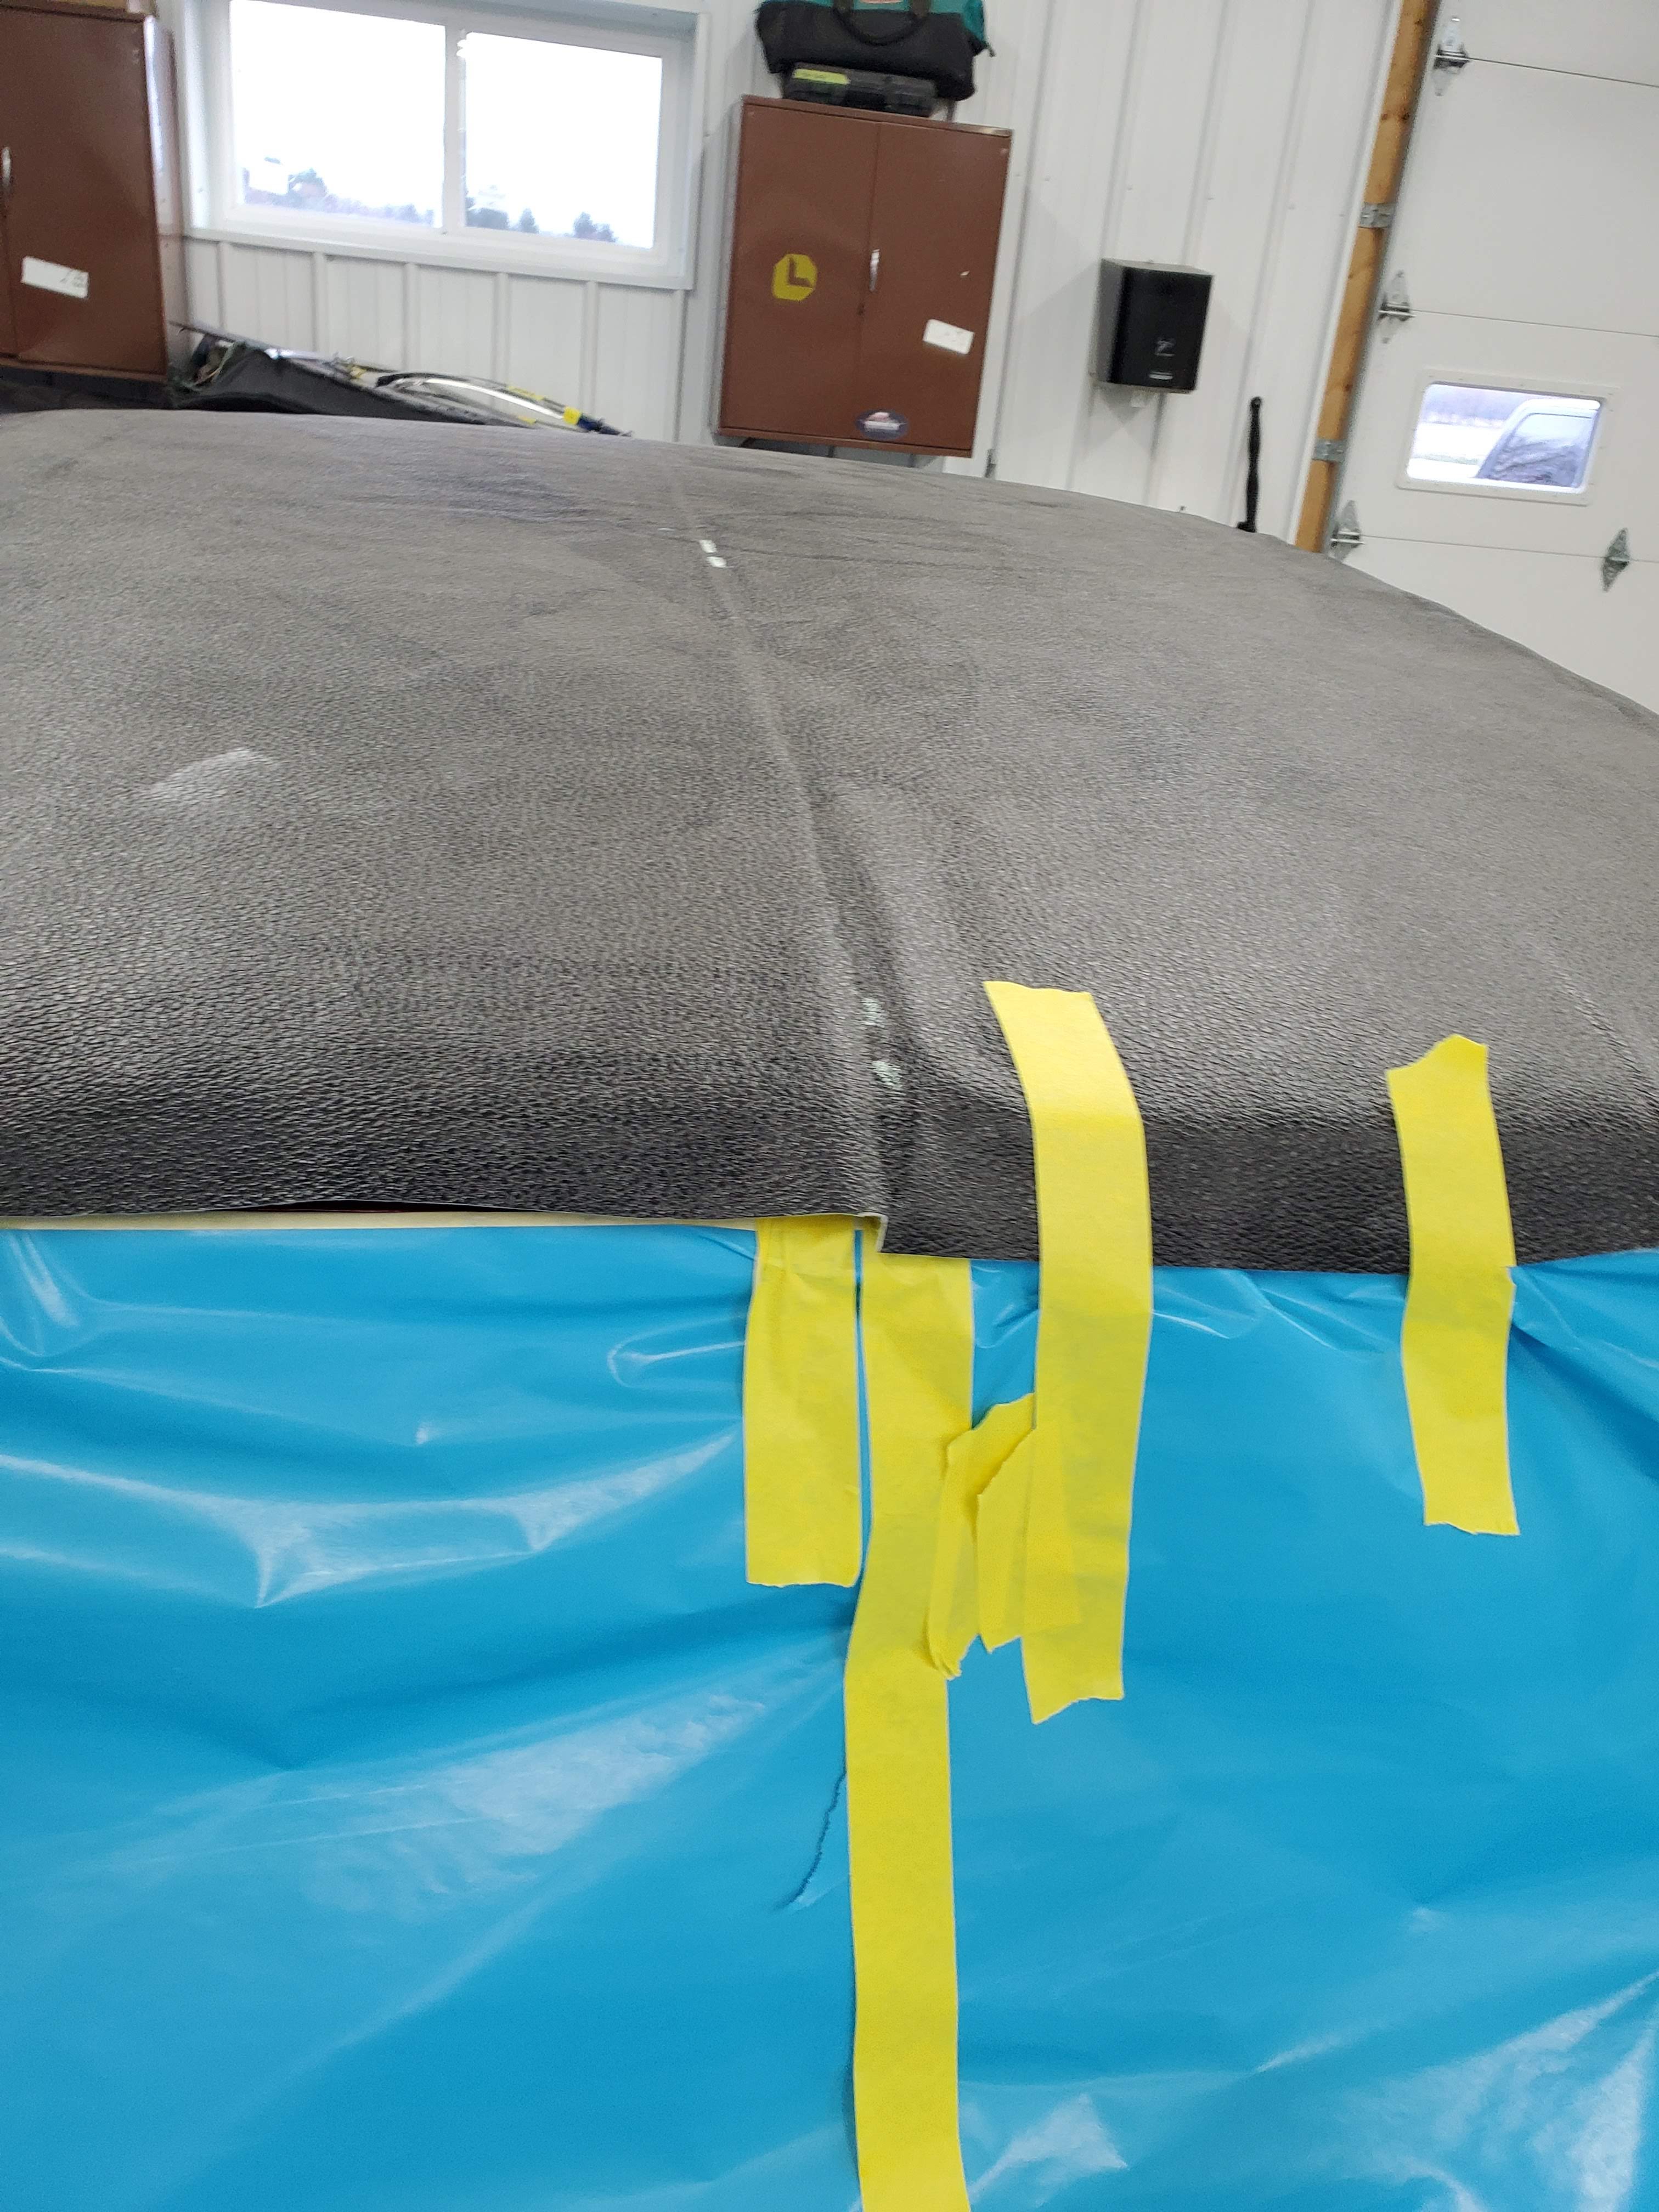
| This top has 2 seams which we measured from center and from drip rails to verify they are equal distance from the center and STRAIGHT from front to back of the car. |
 |
| The vinyl at the drip rail needs to be trimmed exact enough to allow the drip rail trim to fit snug and seal the top from the elements. |
 |
| Top is glued and ready to trim for quarter trim which will be done after numerous test fits after glass is installed |
 |
| Final trimming around clip studs at windows and drip rails can easily be done with a razor blade or exacto knife |
 |
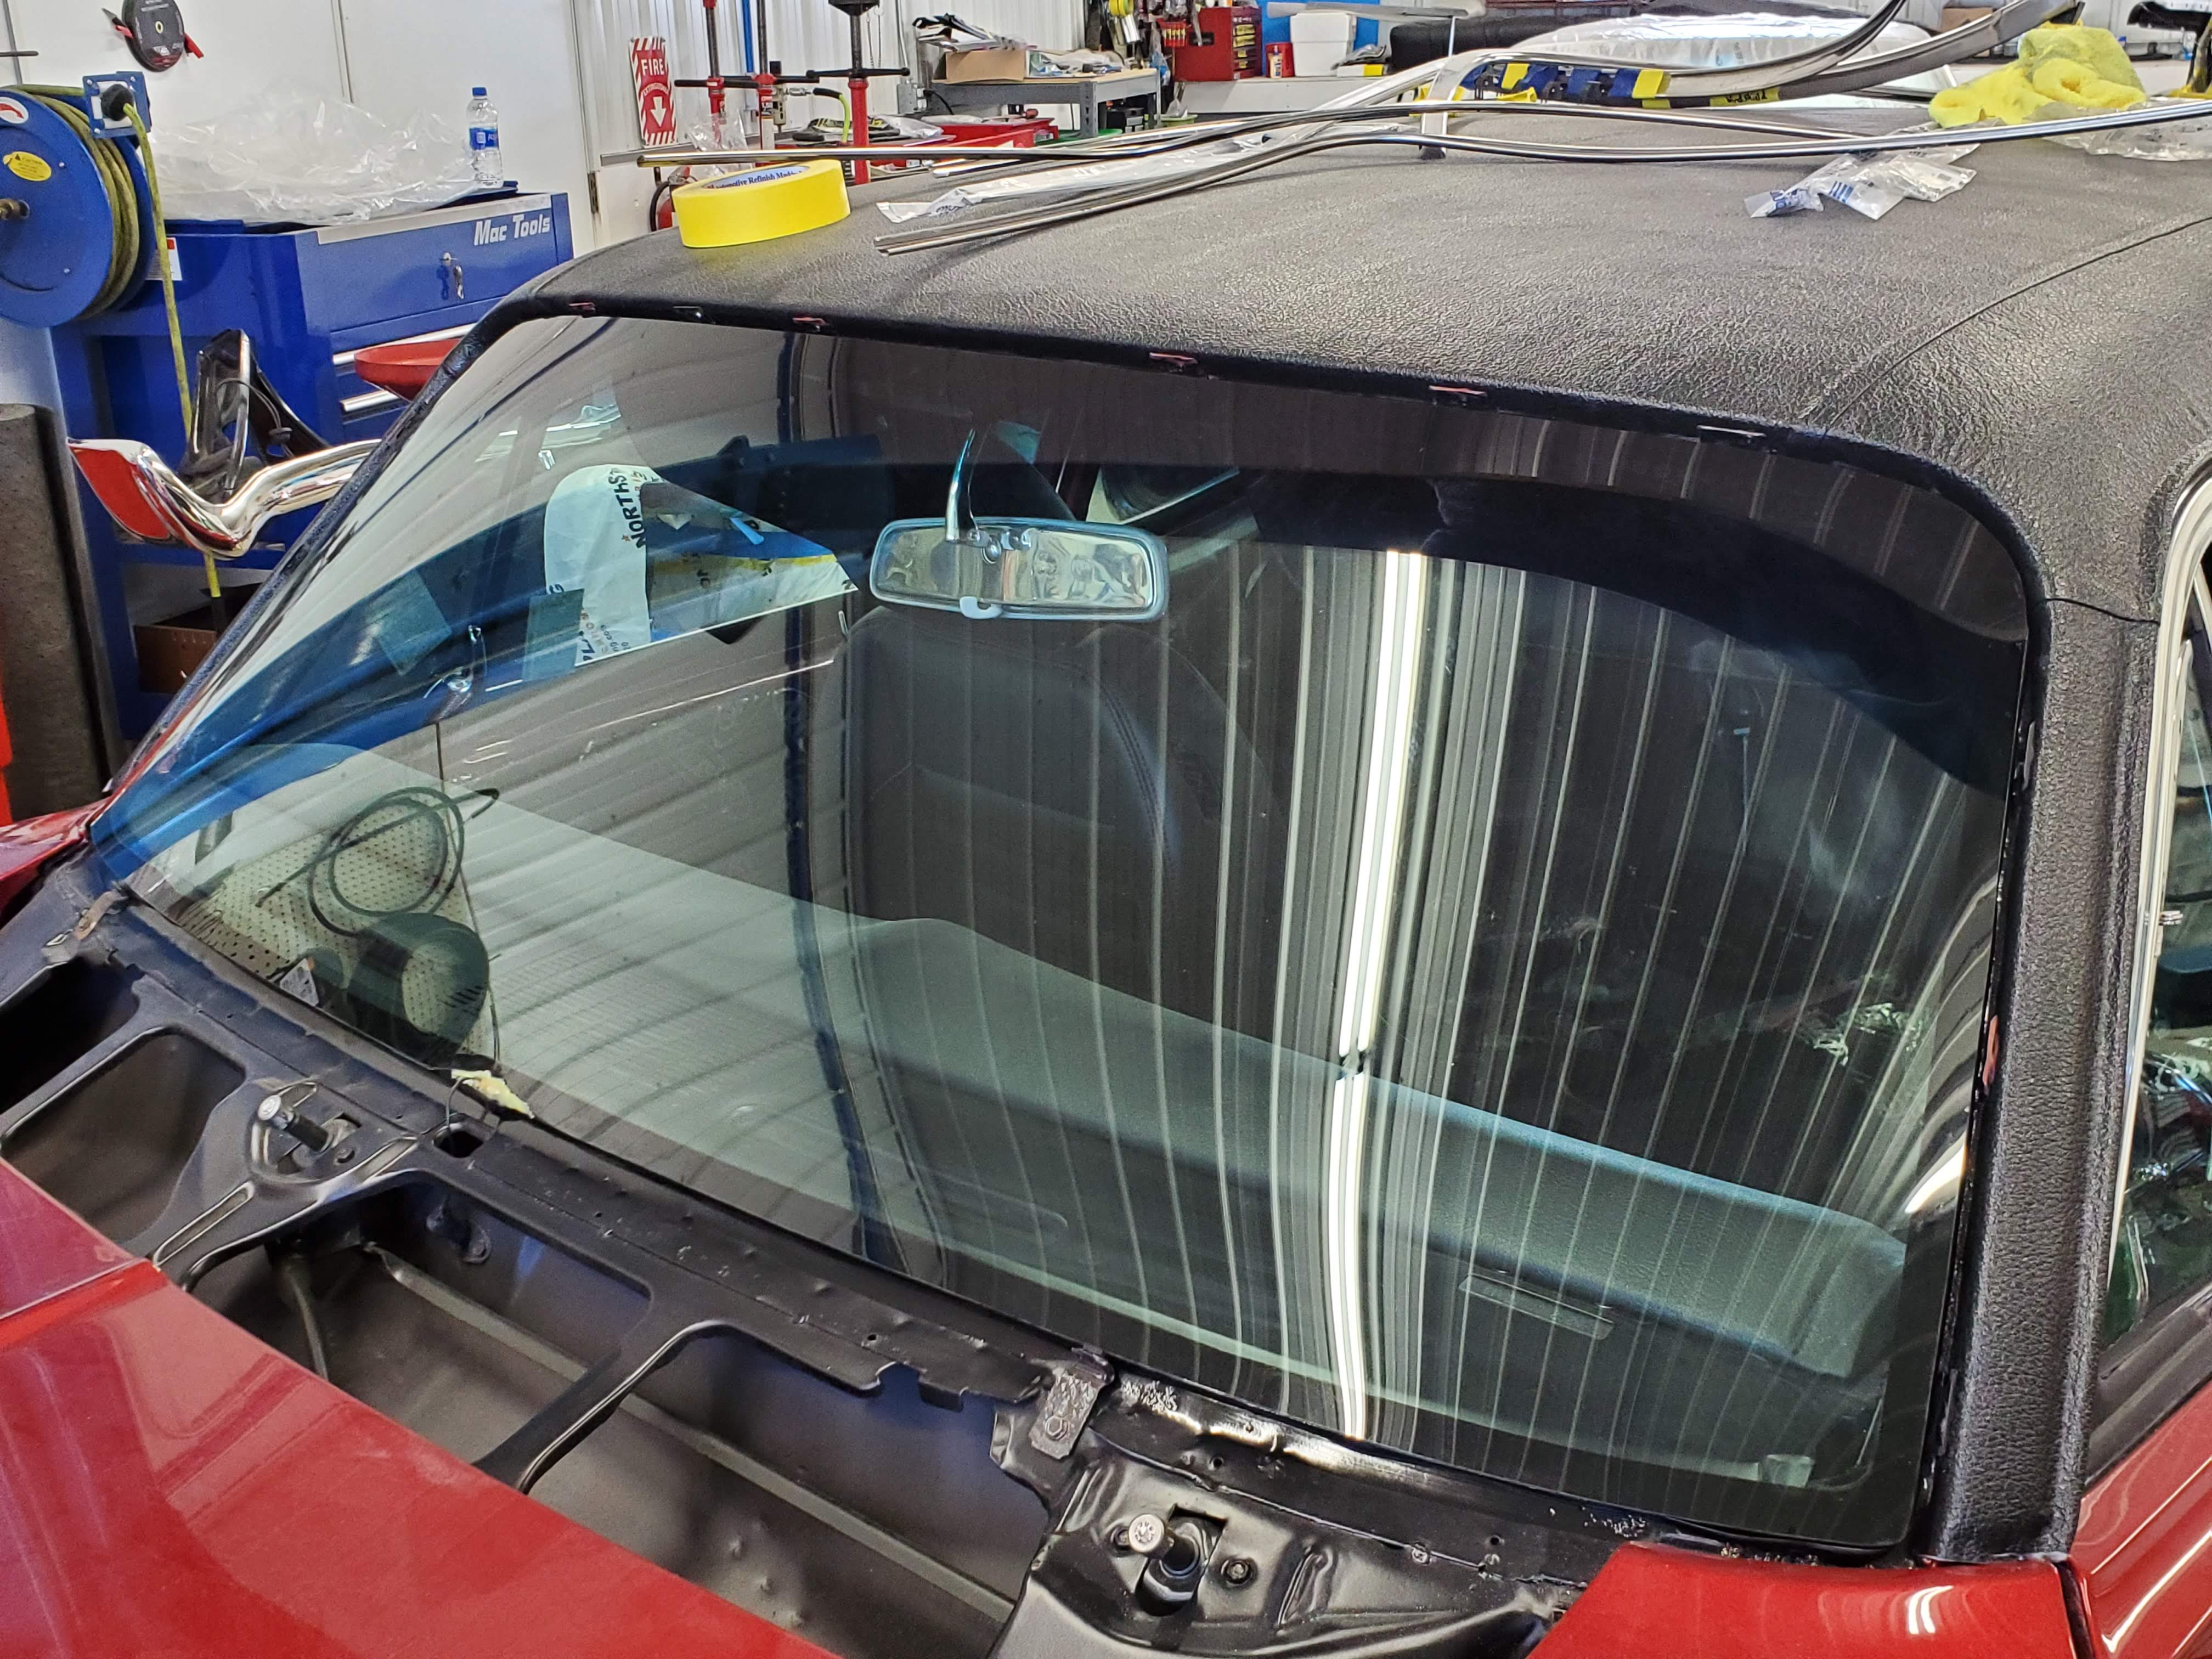
| Windshield and back glass are installed. NOTE THAT THE CLIPS WERE INSTALLED BEFORE THE GLASS! |
 |
| Original trim clips and stainless steel window and drip rail trim installed to secure the edges of the top. |
 |
Window surround trim is installed and the car is ready to ready for final assembly
|
 |
| Final fit and finish on this top for the 1970 Nova |


 The icing on the cake needs to be ready to install so plan in advance! Drip rail moldings have a tendency to get very mangled when removed and will not hold to the drip rail properly if not shaped right. Be sure to repair or re-chrome/polish pitted or damaged pieces as needed. As another note, BEWARE of aftermarket drip rail moldings!!!!!! The fit is often so far off that it may not even hold and can really ruin the look of the car and in some cases ruin the top!


great job im going to have a crack at my LtD very helpfull thanks from down under australia
ReplyDeleteNice job explaining the process. Thanks for posting . I am started working on a 65 thunderbird
ReplyDelete