 |
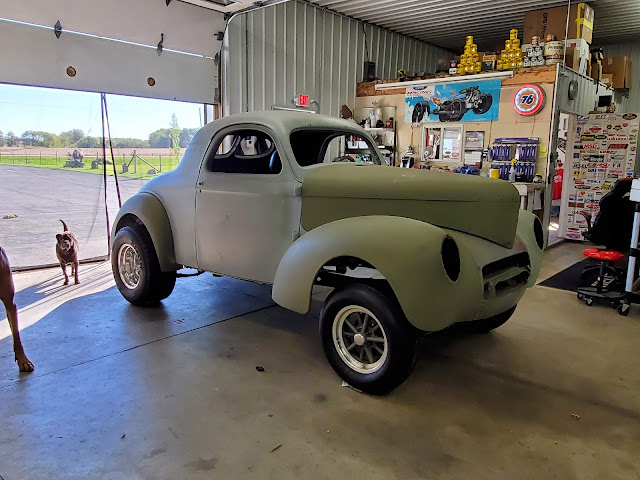
| Willys gasser on arrival in etch primer (green) and primer surfacer over body filler(gray) |
The firewall had a wheelbarrow used as the bump out for the engine to fit. Only one problem...it didn't actually fit the engine and the valve covers were hitting the off center wheelbarrow. The engine mounts were in the wrong position and nowhere near bolting to the engine. And that custom trans tunnel? It didn't actually fit the transmission. This is one prime example of why test fitting before during and after fabrication is essential.
 |
| Test fitting the engine inside the wheelbarrow set up confirmed the firewall design was off center and not big enough to clear the valve covers or distributor |
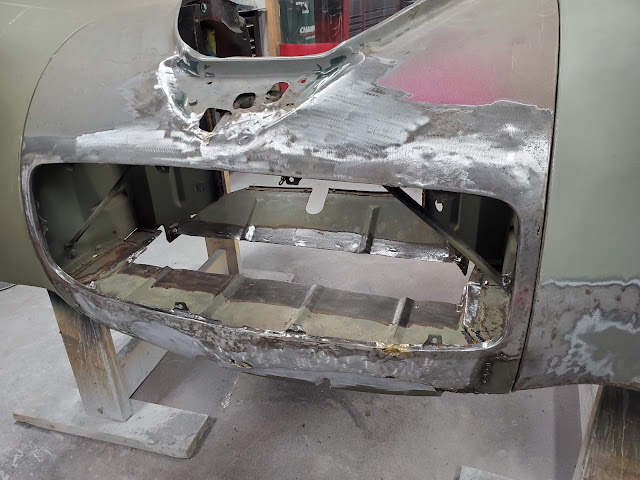
Inside the body, a significant amount of structure was removed behind the seats and at the sides behind the doors. If we left it that way there would be nowhere to secure interior finishes and the body flex would be significant. The trunk floor and front splash shield were made out of a 55 gallon drum which left a whole lot to be desired when it comes to appearance and ease of installing surrounding parts. The grill opening didn't fit the grill at all and was rusted out underneath fresh "patches" welded in place.
Because this Willys combined 1940 and 1941 body styles there were some modifications to make to match the 1940's style. The hood had extra trim holes to weld shut and the door shape is different. The door hinges were welded to the body with the doors fitting relatively well. The edges were shaved to fit and never re-welded, so the sheet metal was separating. However, the doors were already modified with a decent lower inner and outer patch panel to correct the height to fit the 1940 body. At least one thing was done right!
 |
| Trunk floor made from a 55 gallon drum. You can also see the trim on the upper left of the photo nowhere near fitting and the entire gutter around the trunk is roughed out body filler. |
The exterior body shape was suspiciously non-uniform. The trim holes were braised closed so we drilled them out for the body trim we will be installing but when test fitting the quarter trim it was nowhere close to matching the body line. Now we knew there were bigger issues with the body work. Once we started digging it became obvious why fit was an issue!
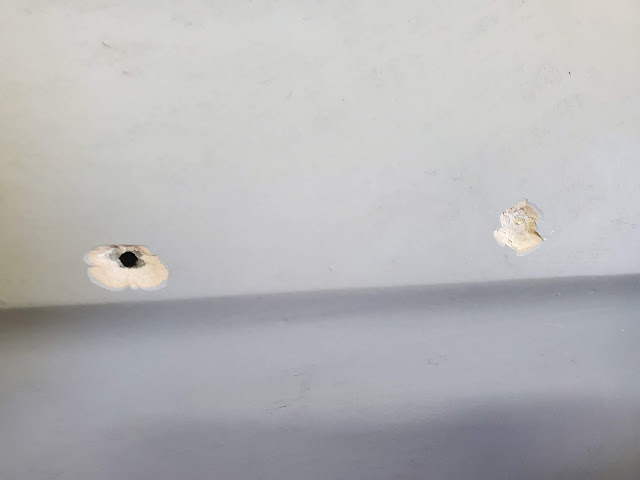 |
| Locating the trim mount holes required excavation. This explained the trim not fitting |
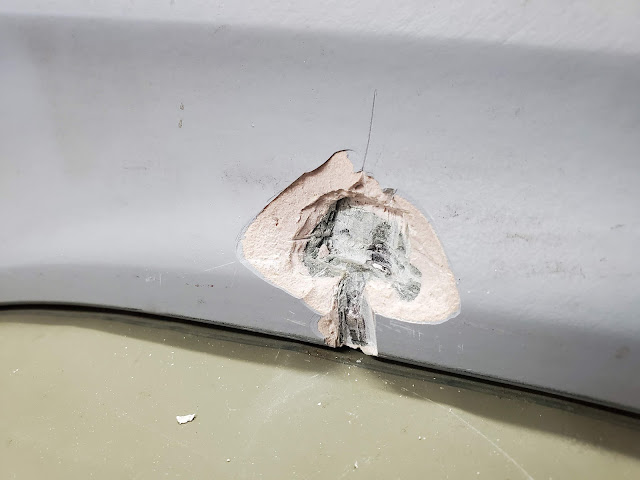 |
| Body filler was used to sculpt the whole body tub into something resembling the shape of a 40 Willys. This much body filler on a high horsepower gasser would crack almost immediately |
Now that we know what we're working with, what's next?
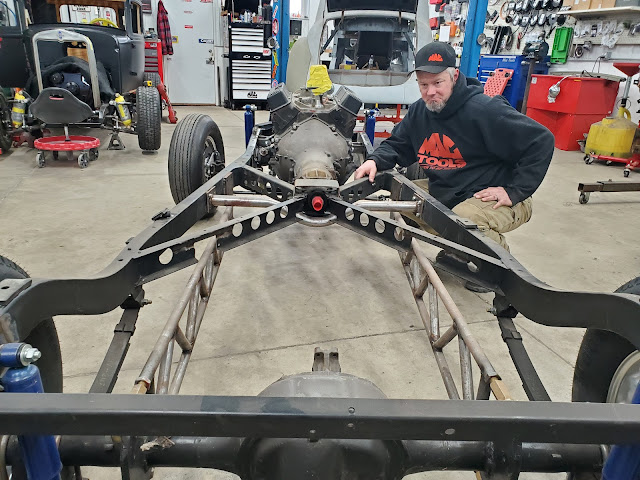
With body test fitting complete we move on to complete disassembly and evaluation of the chassis, which revealed a rail misalignment and non-functional rear axle and suspension set up. These are MAJOR problems requiring complete re-design. So now we know... We will design this build from the foundation up. Frame work started with reinforcing the rails and correcting the x-frame, adding cross rails, correcting the leaf spring mounts and engine mounts and modifying the transmission cross member area so the trans will actually fit. A new third member and re-configured ladder bars will finish out the work.
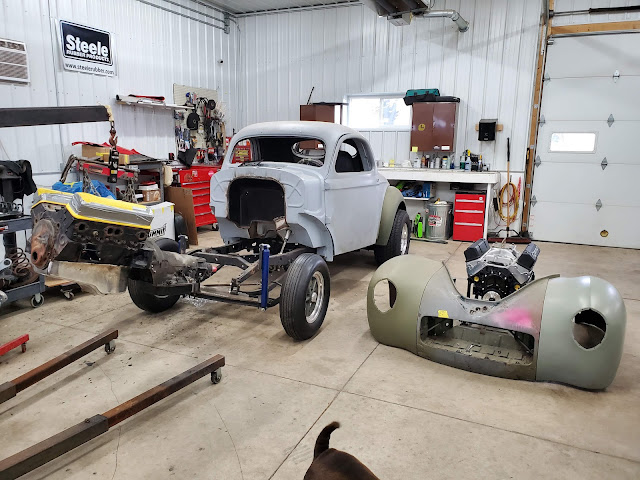 |
| Disassembly begins |
 |
| Steve is evaluating the mess that was made of a perfectly good frame. |
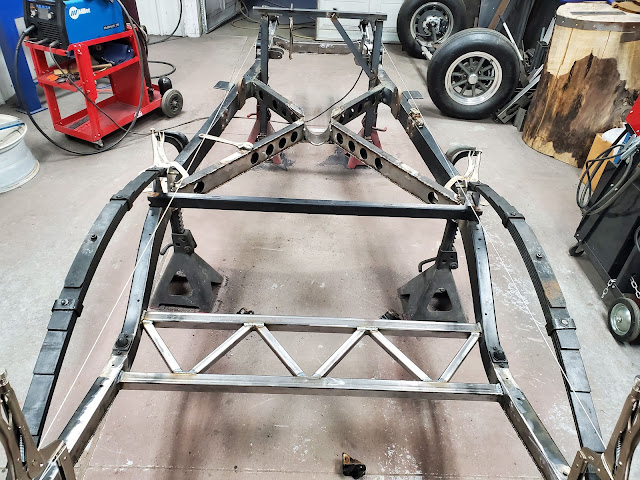 |
| Frame work is underway. It was flipped upside down to allow better access to lower rail welding. Adding more cross bracing and correcting the x-frame has the rails straight, square and level. They were sprung and twisted from the previous work |
After a whole lot of fabrication and reinforcement, the frame design is complete and it's then mounted on a rotisserie to complete paint prep. All the metal was stripped clean of manufacturing markings and defects and the whole frame was sanded and cleaned for sealer and chassis black paint.
 |
| Chassis completed, in the booth for sealer and paint |
Now it's back to the body!
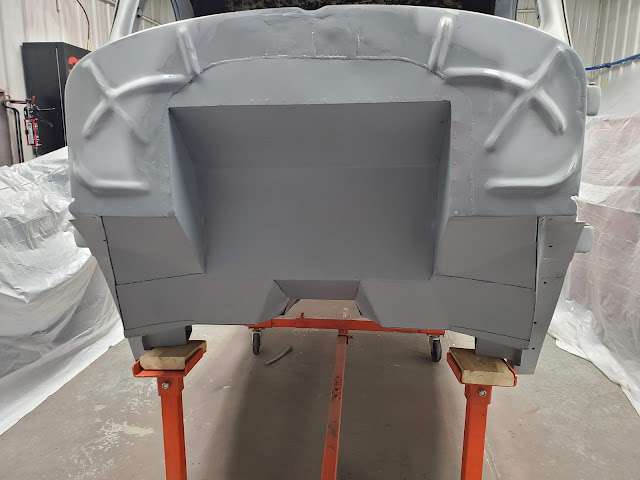
Starting with the firewall, Steve began fabricating and replacing the "customized" areas. The trans tunnel and firewall were redesigned for a much more functional set up. A gas pedal will even fit where it should be! We will also be test fitting the roll bar and designing new interior structural reinforcements that will accommodate a functional interior
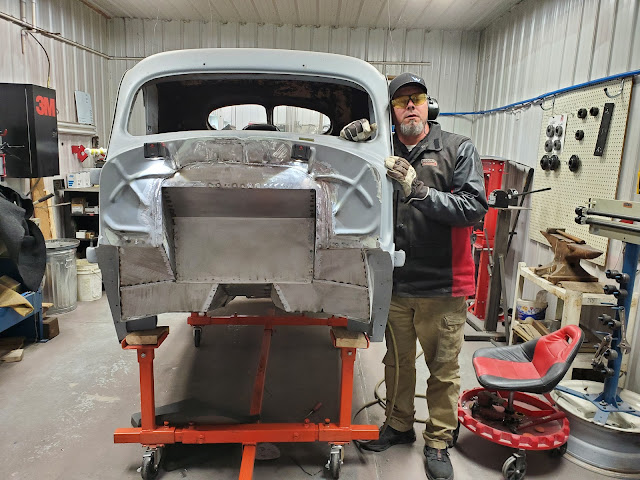 |
| Steve has put in a LOT of hours re-making the firewall to fit the engine. Might be time for a nap |
 |
| The new firewall was sanded, cleaned and seam sealed, then got 2 coats of epoxy primer for rust protection |
 |
| The trunk handle NEVER would have fit with that much build all the way around the opening. Yikes! |
 |
| Stripping all the body filler off the body was a total mess. When we cleaned it up we filled a 5 gallon bucket! The odd thing is that there wasn't really any reason for that amount of body filler. It could have been done the right way much faster |
 |
| The doors were in remarkable shape with a great fit on the lower door patch made to fit the 40 body tub. It was a pleasant surprise considering the condition of the rest of the body |
 |
| All 4 of the fenders needed similar repairs. The lower portion was rotted out and covered up with body filler. We shaped each patch and welded it in place as shown here. |
 |
| The inner portion of the metal below the grill was in rough shape with old patches crudely welded in place on each side and |
It's baffling to us that a build could get so far without fitting any of the major components or testing mechanical function of suspension and steering. Design is not just important, it is ESSENTIAL to the form and function of each build. It's one thing to know what your building but executing the build is where
 |
| The metal repair around the grill is complete and the grill is test fitted to ensure it sits in the opening and lines up with the mounts |
Work continues on the Willy's as we finish up some body tub metal repairs, modify the trunk lid for a recessed license plate and the trunk floor to fit the fuel cell underneath. Inside the car, a roll bar and harness set up will have this street machine track ready for a little weekend fun
For more information leave a comment below, we love hearing feedback as well



No comments:
Post a Comment
Leave your treadmarks: