1980 Trans Am Turbo 301
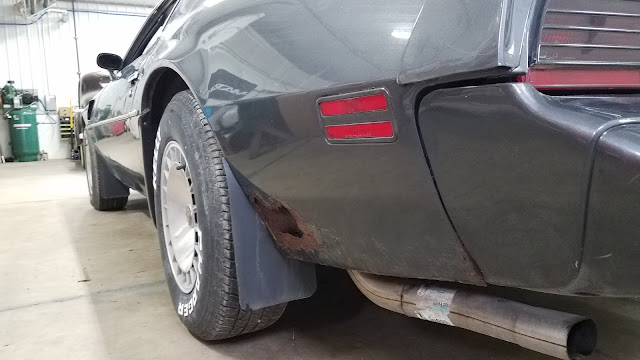
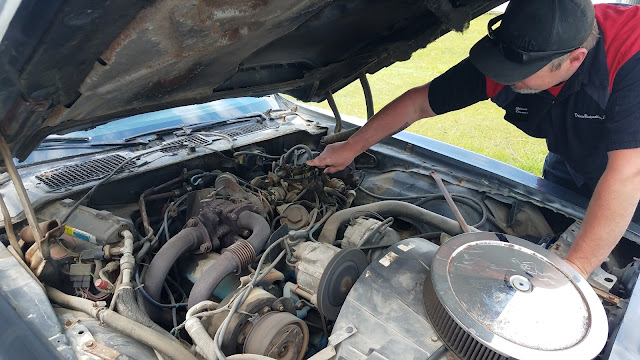
This one owner 1980 Pontaic came to us several years ago in need of a mechanical diagnosis of a severe engine knock and a complete repaint. The body was fairly aged with a few areas that had some rust holes, but it looked like it was just sheet metal rust and the majority of the structure was intact. It still had it's factory color, Ontario Gray, but at some point it had been repaired and repainted with the wrong Phoenix put on the hood. The graphic was turned the wrong way and the all of the decals were the wrong color. Although some parts would need replacement, it was mostly complete other than missing the air cleaner which turned out to be very challenging to find!
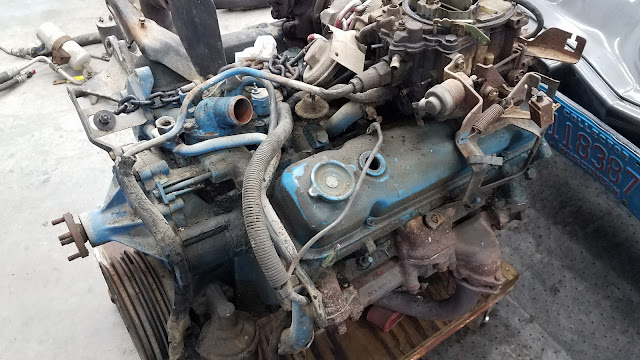
That engine knock was very pronounced, and after testing and inspection it was decided to fully rebuild the engine and the turbo and replace several components related to it. The engine was fully disassembled and sent out for machining at Advanced Engine Concepts in Green Lake WI. It was bored .030 over and got an upgraded cam shaft along with some modest head work for better flow. The Turbo required a few new parts we were able to locate in Kenosha WI from TTA Performance.
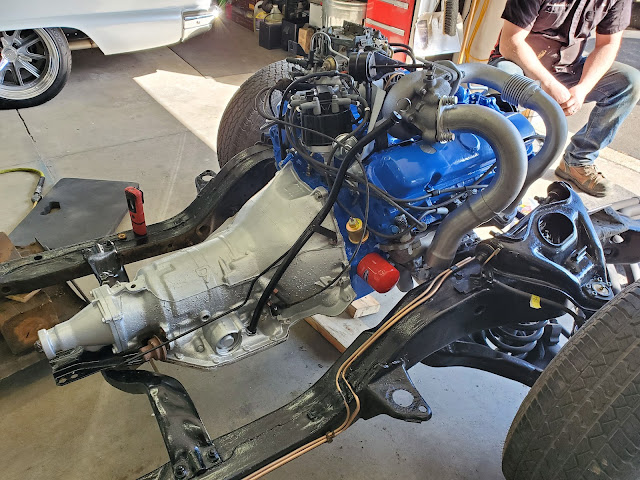 |
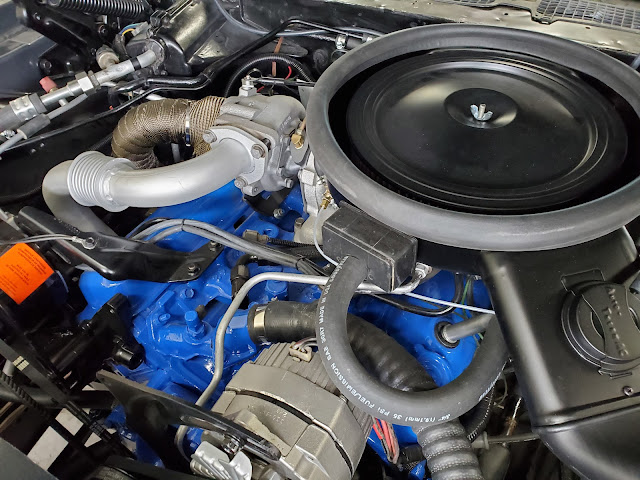
| Fully rebuilt and refinished engine and transmission |
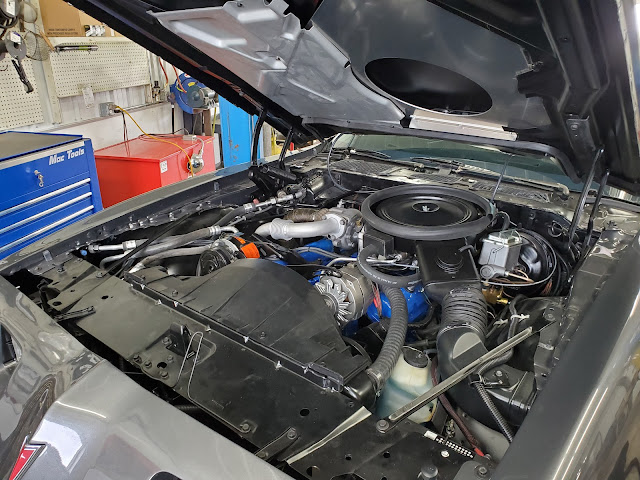
After a complete engine and engine bay paint job, the under hood looked almost too nice to drive.
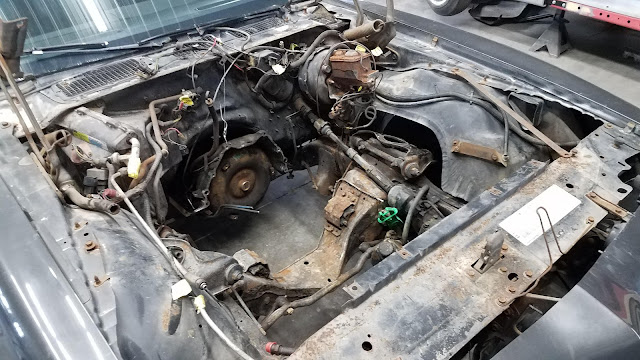 |
| Just a little work to do here! |
Now, back to what we did to the body to get to this point.
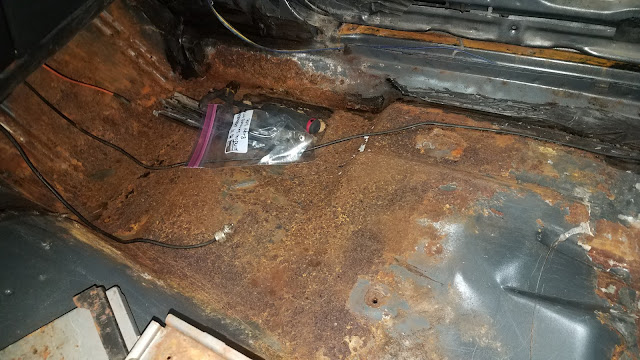
Let the rust repair begin! What's getting fixed? Here's the rundown:- Trunk floor
- Full tail panel
- Gas tank straps/trunk supports
- Lower left and right quarters
- Lower fenders and left inner fender structure
- Lower front quarters at sill plate
- Complete left outer sill plate
- Driver side rear floor pan
- Passenge side front and rear floor pans
- Frame rail at right spring pocket
- Floor to rocker at driver side wheel housing
- Inner wheel housings at frame rail in wheel wells
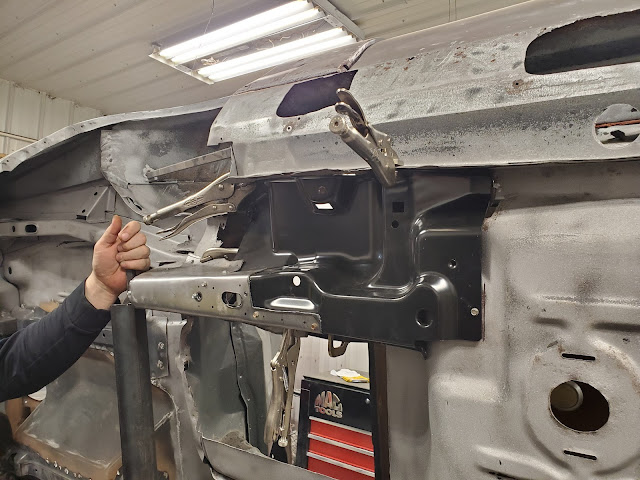 |
| This repair is not just for the floor. It's a major structural area incorporating the rail and interior floor, to the rocker and rear wheel housing. Bracing and correct execution of this repair are critical. |
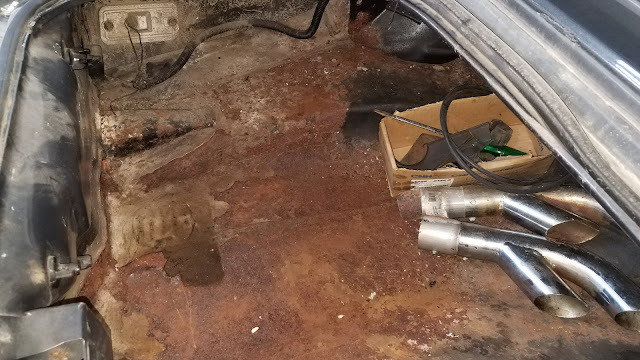 |
| There was nothing solid about that trunk floor. The entire left half was squishy flakey rust. Once disassemble the rust continued to the back panel, requiring a replacement trunk floor and tail panel as well as lower quarter repairs |
 |
| After replacing the panels the spot welds were ground smooth and the whole panel prepped for primer to get rid of the bare metal areas after the repairs. |
With the metal work at the trunk and quarters complete, we prepare to tackle the underbody issues. The rear spring pocket and the surrounding floor, one full rocker, and 3 floor pans needed replacement.
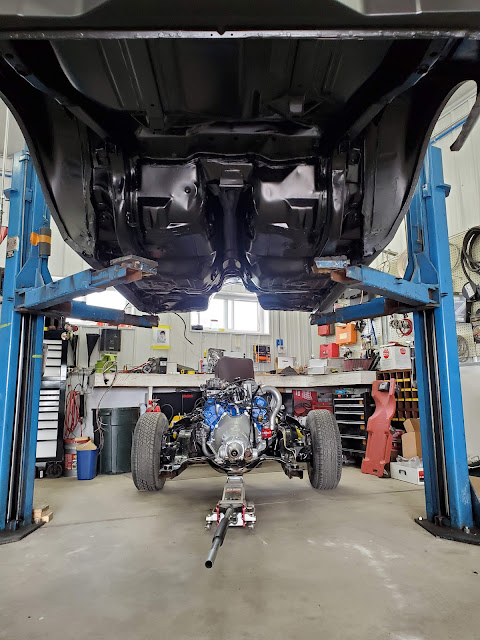
To do this right (and save ourselves extra body aches) we had to completely remove the front clip and rear axle and fabricate mounts for the rotisserie. Once mounted it's much easier to work on and we can fully prep the underbody with sandblasting and cleaning. Finally we seal it up with seam sealer and fresh black epoxy for corrosion protection and then paint, so it looks great and it will last a lifetime on the road.
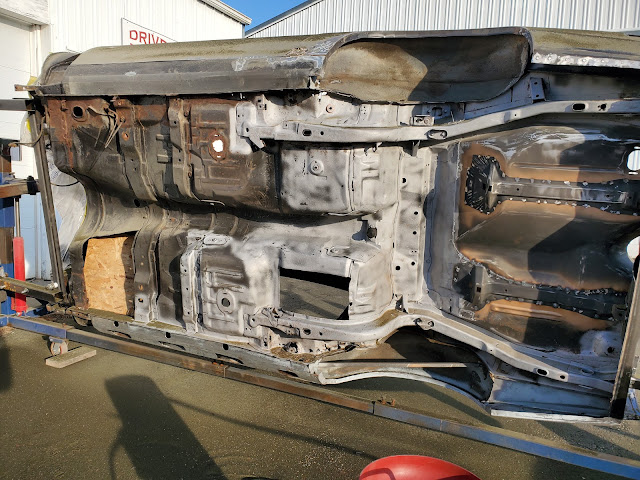 |
| Underbody structure and floors were scraped clean of undercoating and seam sealer, then sandblasted and cleaned. Final metal repair work was done, then the whole underside was seam sealed and prepped for epoxy sealer and black paint |
 |
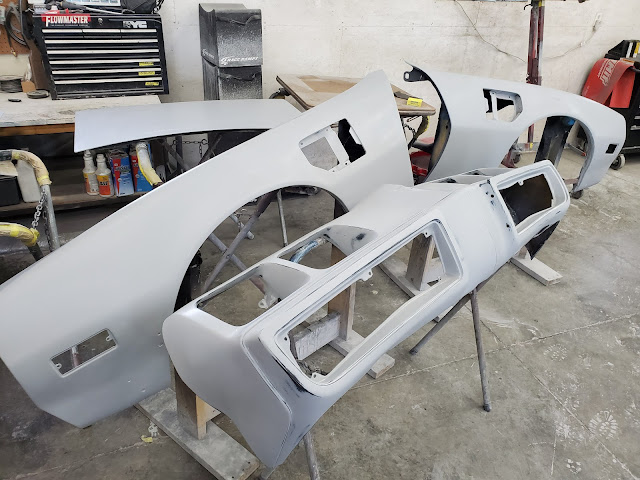
| Wheel housings, tail panel and firewall were painted black after the repairs and the rest of the body was coated in 2 coats of epoxy primer before beginning body work and initial straightening. |
 |
| The engine work was complete, so we re-installed it and put the car back on it's suspension. This is critical for panel fit and gap correction to be done properly. |
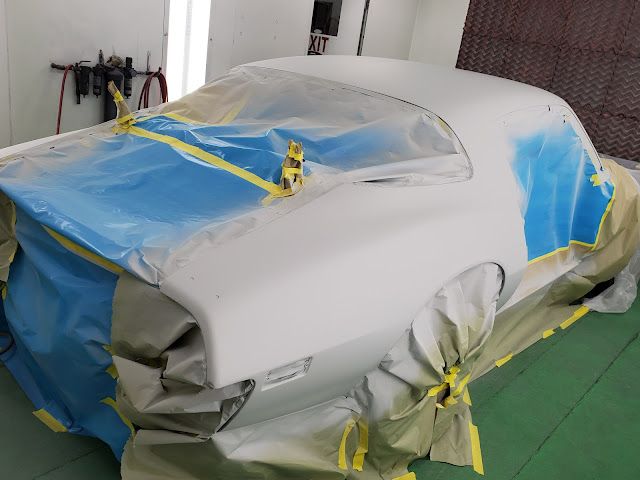 |
| After initial straightening and final patch repairs it went back in the booth for primer surfacer, also called fill prime. |
 |
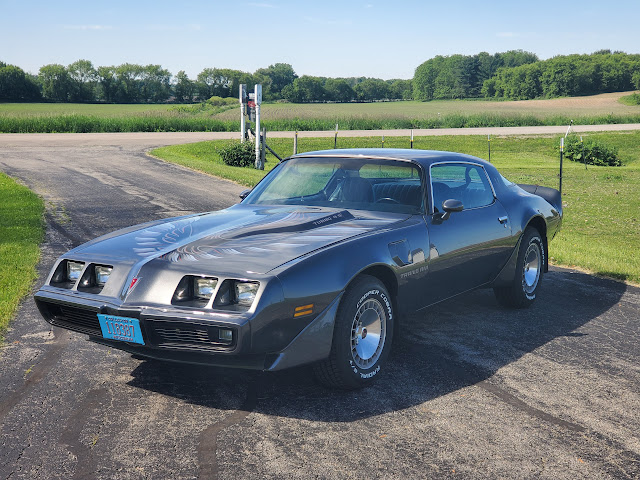
| After a LOT of sanding at every stage of the restoration, the body was finally masked for paint! The original Ontario Gray looks really nice when it's fresh and has a nice layer of clear coat bringing out the metallic. |
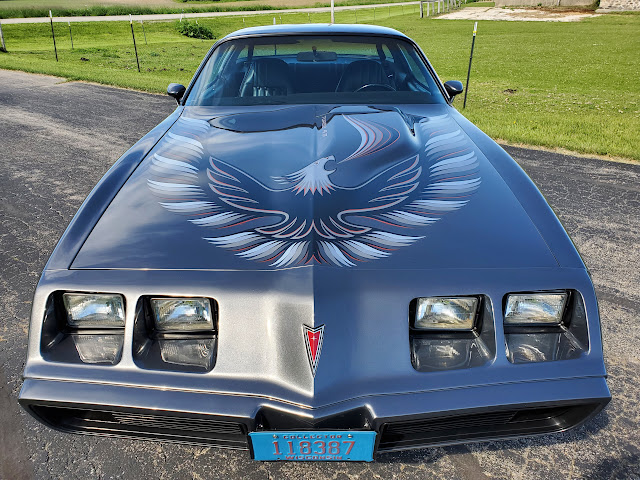
Numerous brackets, backers and structural pieces needed sandblasting to remove rust and were then painted black or gray before reassembly. The window trim was stripped and re-painted, windows re-installed, and the entire body and front bumper reassembled with new Steele Rubber weather-strip and seals and numerous specialty fittings from Firebird Central. The correct graphics set from Phoenix Graphix topped off the original look.
 |
| Graphics kit and final assembly completed. Time for the photo shoot. |
 |
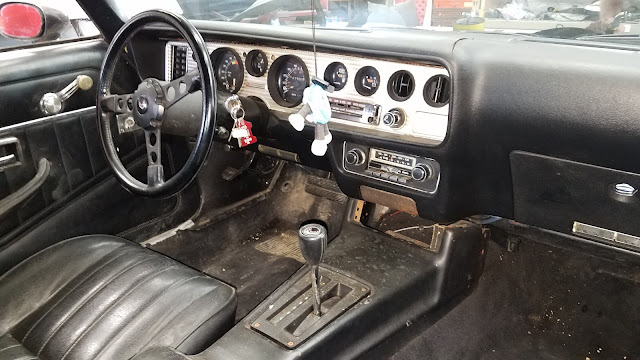
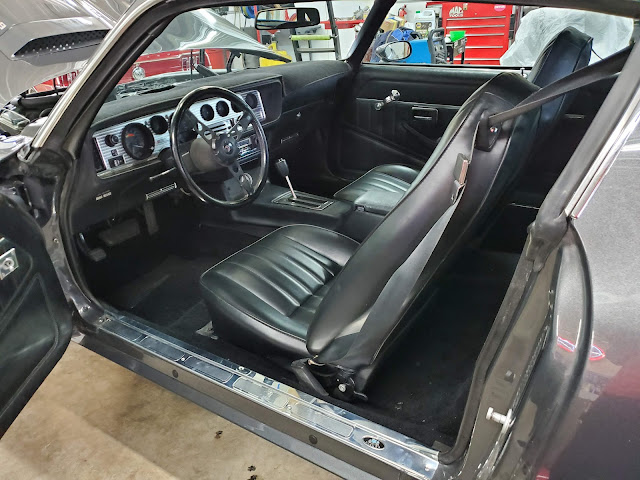
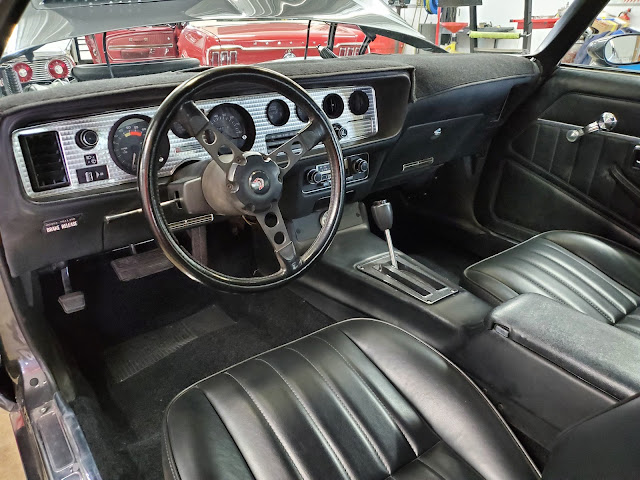
| 301 Turbo Here's a little look inside the completed restoration. The interior work included sound deadening and new finishes including carpet, headliner and seat covers, but using mostly original gauges and "hard parts" like steering wheel, window surrounds/plastic trim, window cranks and shift components. Some of those old plastic and vinyl pieces shined right up! This is the part where we send the this Trans Am homeAfter completing the restoration we did the final photo shoot and test drives followed by a complete final detail. At the beginning of June, 2021, the 1 and only owner of the 1980 Turbo Trans Am picked up his car along with some of his family. The car got the seal of approval from his grandson before it was driven back to Southern WI and tucked in at home in a garage with a few other items... Some of those items require battery chargers... Sometimes those battery chargers go a little haywire, causing... |
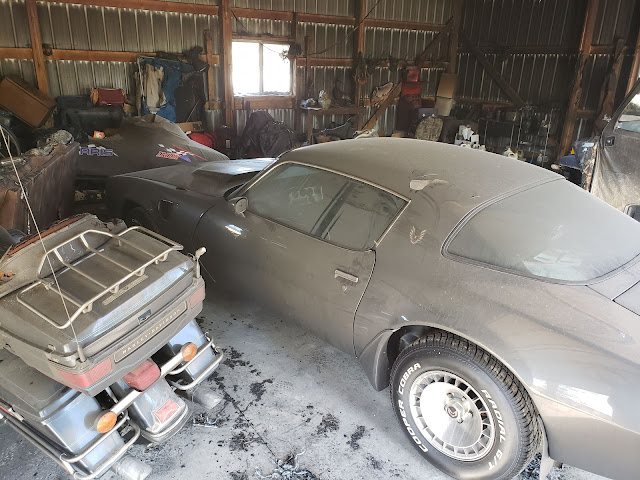
You guessed it... A GARAGE FIRE!
One of many nightmares we all hope never to experience. Fortunately damage was kept to a minimum and the fire crew was quick to arrive. Nobody was in the garage at the time.
Any vehicle will suffer damage from the heat of a nearby fire, but the Trans Am and Firebirds of this era had a lot of urethane parts that will readily melt and deform.
Upon initial inspection we noted a lot of heat damage.
Needless to say we will be evaluating the car much more closely when tear down begins. Inspection of all under hood mechanical and electrical components, and insides of the left door, left fender and roof will tell us just how far we have to go with this re-restoration. If the paint and primer on the insides of the body panels shows heat damage and peeling we will be starting from square one with refinishing. At least we know there won't be rust or other surprises underneath the paint this time!
 |
| The rear tail light assembly and rear bumper deformed and melted |
Upon initial inspection we noted a lot of heat damage.
- The windshield was broken with bubbles appearing in the glass
- Both side mirror glass was melted
- Door weather-strip and exterior window felts are deformed or shrunk
- Taillight assembly and gas door melted and misshapen
- Front bumper was mostly free of paint and melted significantly on the left.
- The rear bumper is deformed mostly at the left quarter
- Left side flares deformed
- Paint peeling off the body mostly on the left side but extending up over the roof area
- Front and rear window trim is deformed
 |
| The heat from the fire caused the paint to peel off in several areas |
Needless to say we will be evaluating the car much more closely when tear down begins. Inspection of all under hood mechanical and electrical components, and insides of the left door, left fender and roof will tell us just how far we have to go with this re-restoration. If the paint and primer on the insides of the body panels shows heat damage and peeling we will be starting from square one with refinishing. At least we know there won't be rust or other surprises underneath the paint this time!
 |
| Despite not actually catching on fire itself the paint is peeling |
We are preparing for Restoration 2.0 for this Turbo
Now it's a matter of working with the insurance company to prove the value of this classic vehicle and the costs to restore it. This is made a bit easier because we JUST did it a few years ago and we can provide all of the invoices proving the amount invested in this Trans Am. The detailed documentation on monthly invoices and over 1200 photos of the process will prove it's worth!
Later in 2023 we plan to get the car here so we can finalize what parts we need to replace and begin sourcing OEM parts wherever possible. In this industry it is very rare to restore your own finished restoration. It will be a unique opportunity to see the way our finishes hold up and to compare tear down on our own work versus the nightmares we usually uncover when beginning a complete overhaul.
Although we wish we didn't have to re-do the car, especially under these circumstances, we must have done something right the first time for the owner to bring the car straight back to us for this round of repairs.
Follow our blog for future updates!
Comments and questions can be posted below or sent to drivenrestorations@gmail.com
More photos can be seen in our build album or on Facebook







No comments:
Post a Comment
Leave your treadmarks: