1977 Pontiac Trans Am Restoration: Metal Repair
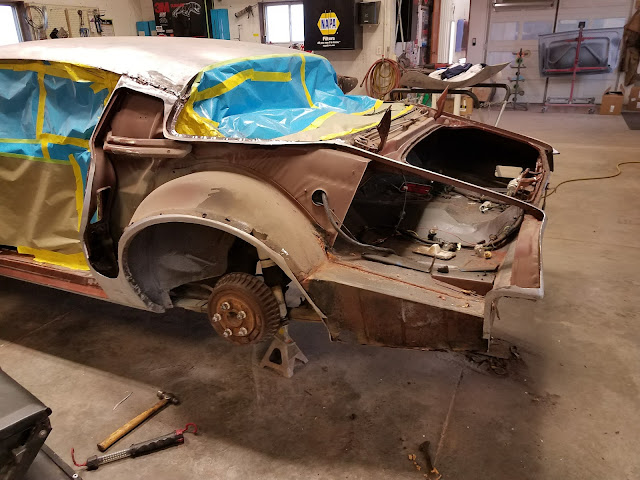
At first glance, this 1977 Trans Am looks solid. It's well cared for, driven frequently (only in the summer), and any minor body damage or mechanical repairs were always done promptly. But there was a dirty little secret hiding under the whopping 5 layers of Brentwood Brown paint(see the video tour of paint stripping on Facebook). Old repairs left the rear wheel housing, trunk extension and quarter panel with rust eating away at the sheet metal.
In the photos that follow, we show you the rusty consequences of incorrect metal repairs and how we fix it at Driven Restorations LLC, using fresh sheet metal on this 1977 Pontiac Trans Am.
Step 1: Disassembly and Discovery
Preparing for disassembly, Molly did a video detailing the exterior condition of the '77 Trans Am on Facebook. In this video we point out some known trouble areas as well as make note of some hints of hidden surprises we uncover later.
See the video below:
See the video below:
At our shop, we ALWAYS strip our customer's cars to bare metal. This starts with disassembly. All decal's, body trim, weatherstripping, door handles, windows, and mirrors were removed from the car before we began chemically stripping and sanding the paint from the car's body.
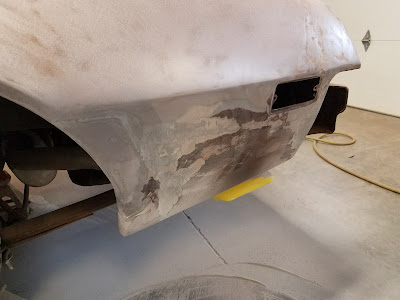
As we stripped all 5 layers of paint off the Trans Am, overall it was in remarkably good shape with minimal dents or surface rust. There were obvious issues with the hood and front end fit which is very common from factory for this year and model, and the door hinges and bushings needed to be replaced. Again, very normal. The owner had informed us of at least 4 complete re-paints, bumper plastic repairs and lower quarter patch panels so we were expecting a few issues. But the extent of the old lower quarter panel repairs only became ominous after discovering rust holes on the outer wheel housing and near the bumper mount location at the rear of the car.
 |
| Uncovering the old lower quarter patch |
Covered with at least 1/2" of body filler on the outside and a GIANT SCHMERE of 1-2" thick filler on the INSIDE, the metal repair issues were hidden from view, leaving only an extremely thick panel as evidence that something was amiss. The wheel housing and under body were topped off with a generous layer of rubberized undercoating. The result was a repair area that was eating itself away from the inside out.
 |
| A Closer look at the relief cuts used to form the wheel well arch, leaving the inner lip vulnerable to extensive rust formation on the quarter panel and the outer wheel housing |
 |
| Close up of the filled in drain hole in the trunk drop off. |
 |
| Layered patch over original sheet metal of the lower quarter. The bottom lip of the original quarter was rusted through. |
 |
| Multiple holes formed under the rubberized undercoating on the outer wheel housing, now forcing replacement of additional sheet metal to correct it and prevent future issues. |
Step 2: Sheet Metal Removal
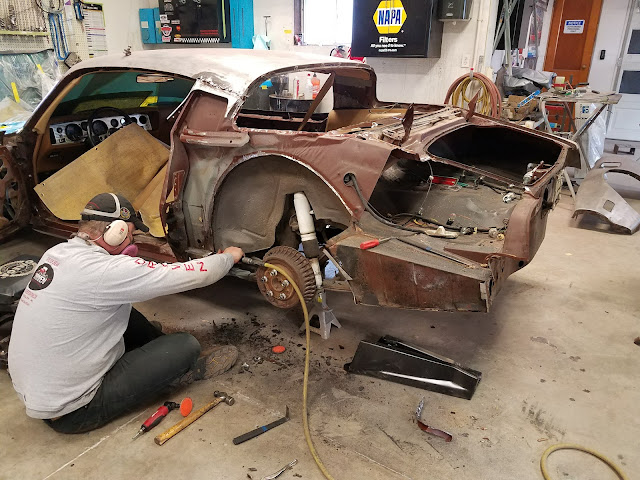
The entire quarter panel, outer wheel house and trunk extension need to be replaced with new metal to ensure a correct, long lasting repair
Step 3: Test fit and Panel Prep
The step that so many well meaning people skip: Test fitting
You wouldn't buy a leather coat without trying it on first right? Consider this an investment in your car's future value, similar to buying a very expensive article of clothing. It looks great on the rack, but it fits every body differently!
The panels MUST be test fitted. Just because they are new and stamped in a factory from "factory molds" does not mean that they will go into place like a piece of a jigsaw puzzle. Molds wear out over time, sheet metal isn't always perfect when stamped, and delivery drivers don't always ensure your panel stays upright in the truck. Test fitting is time consuming, repetitive and can be frustrating, but you will not regret taking the time to do it!
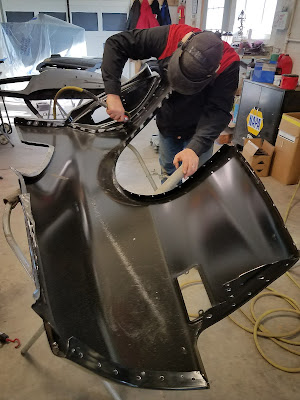
We were very happy with the fit on these parts (made by AMD) and needed to do minimal re-working to achieve the end result that will give us the proper door gap, trunk lid gap, spoiler fit, bumper fit and a straight body line from door to quarter panel.
 |
| Quarter panel is being test fitted one final time before prepping for installation. Minor modifications were needed to the roof seam area and lower front quarter to achieve proper fit and alignment. |
 |
| Quarter panel prep in progress. Note the holes on the lip of the sheet metal mirroring factory spacing and location of the spot welds |
After test fitting the panels, mark your panel alignment holes, where you had it screwed in place, so you can find the sweet spot quickly for final installation.
Then the sheet metal has to be removed. Again. Yes, we know, did we mention that panel fit can be repetitive?
Once removed, the panels are prepped for welding by punching holes approximately every 1.5". Use factory spacing when gauging distance between welds. Grind the e-coat off the area to be welded, then apply weld through primer to the seam surfaces of the panel where it will be welded.
Step 4: Panel installation
 |
| Outer wheel house and trunk drop off are welded in place and then covered with primer again. NO BARE METAL should be exposed anywhere in the repair area, especially where metal touches metal. |
 |
| The quarter panel is screwed and clamped in place. We are ready to weld. Remember to go slowly and space out your welds. Also, remove the guide screws and weld the holes closed before you're done. |
*A note about safety: We use a lot of welding blankets to protect interior surfaces from catching fire. A "fire spotter" (a second person in the shop to watch for flames or smoke) is recommended when you're in a location near flammable materials. In areas too close to the gas tank or interior cloth, a product called "panel bond" can be used. It seals the metal with the strength of a weld and protects the seam from moisture penetration similar to how you might use caulk or construction adhesive in your home. *
Step 5: Prep for Epoxy Primer
Now you might think is a great time to sit back and admire your work. After all, you spent all that time test fitting, aligning, re-aligning and positioning those panels! However, you've got a car in bare metal and with fresh repairs! Prepping the body for primer starts immediately by grinding any welded seams flat and sanding off weld spatter from panel surfaces.
 |
| View of the completed repair in the door seam area |
Step 6: Epoxy Primer
After sanding the e-coat and prepping all areas to be primed, the car needs to be masked off and cleaned with de-greaser. Once cleaned, the exterior and any bare metal areas that were repaired need epoxy primer to provide a weather sealing coating over the bare metal and a uniform base layer to begin blocking and straightening. Body filler should not be applied directly to bare metal as it does not seal the metal from moisture or prevent rust. Only after coated with epoxy primer do we recommend starting body filler and straightening.
 |
| The '77 Trans am metal repair is complete and the car body is ready for block sanding and straightening with body filler. |
Metal work is complete!
Thanks to it's owner's investing in correct repairs, this 1977 Trans Am will be enjoyed for decades of summer car cruises to come.
Questions or comments? Share below or email us
For updates and more information on our restoration techniques, current projects and a little fun in the shop, visit our Facebook page


What was the cost to replace that quarter?
ReplyDelete