December 7, 2021

1940 Ford Sedan Running Boards: Replace and Recover

Missing or Rotted Out Running Boards? 

No Problem!

Some jobs are more about function than appearance. This was a case of bringing a well used and much loved family car back to life. Our customer wanted their dad's 1940 Ford Tudor Standard Sedan back on the road for the family to enjoy together. When it arrived in multiple pieces, we knew there was a lot of ground to cover before the car would be road worthy, including replacing the original running boards and covers.


1940 Ford Tudor Sedan
1940 Ford Standard Tudor Sedan

1940 Ford Running Board
New metal running boards and covers received and test fitted. ALWAYS Test fit covers to the boards and boards to the car to verify fit.

With the new boards and covers both received we can go ahead with verifying correct fit before we get to much further. ALWAYS test fit!!!! ALWAYS! 

November 15, 2021

Rallye Gauge Replacement 1970 B-Body Mopar

1970 Rallye Gauge Rebuild with Tic Toc Tach

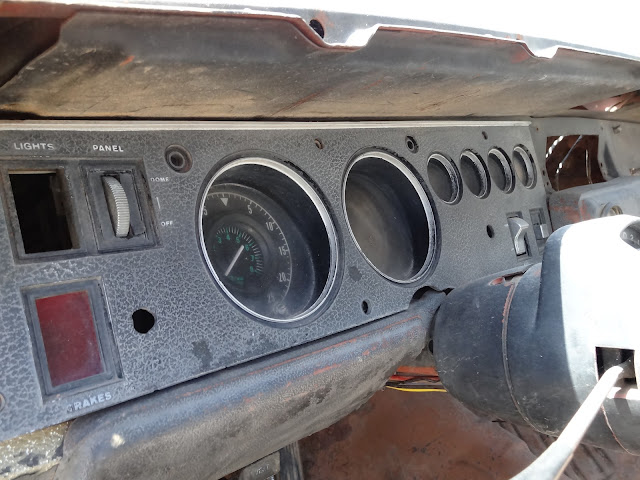
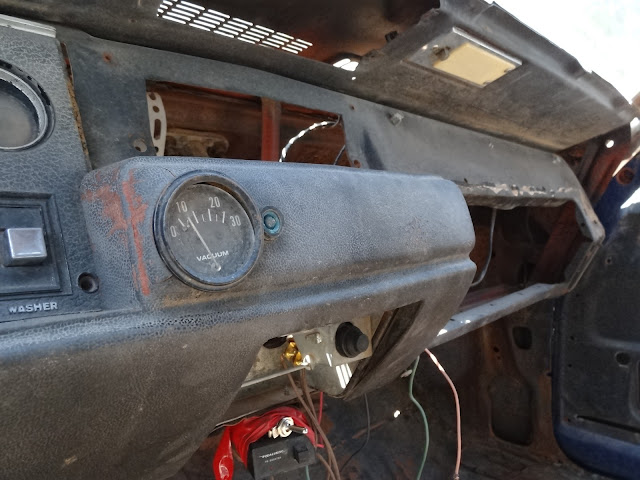
While we typically try to restore and re-use original parts, replacing the gauges and gauge face parts on this 1970 Dodge Charger R/T was a necessary upgrade. None of the gauges were operating or in restorable condition, including the tick toc tachometer. The dimmer switch was non-functional and there was an assortment of  "custom" additions to the dash area (random toggle switch and button anyone?) and critical deletions...like no heater box, radio, light switch, faceplate, glove box etc. Needless to say it was a mess. 
1970_Charger_Dash

1970_Charger_Center_Dash

In this case we removed the entire dash, steering column wiring and everything associated with the firewall as the car was undergoing a complete restoration. This makes it much easier to get the gauge cluster out. You can remove  the whole cluster from the front of the dash if you need, to but we'd recommend masking off the painted areas and dropping the steering column. Small hands help reach all the connections too!
1970_BBody_Gauge_Cluster
Continue reading to view the process...

February 4, 2021

Vinyl Top Installation Guide

Vinyl Top Installation on a 1970 Nova SS

 Step by Step Photos and Descriptions

Vinyl top installation doesn't have to be intimidating. Following a few basic steps and using the correct tools and materials can yield long lasting, show winning results like the one shown on this 1970 Nova SS. 

1970 Nova SS with black vinyl top


Freshly painted 1970 "4th Quarter Nova" SS

    Depending on your situation you may be replacing a top or installing a new one after fresh paint(we should all be so lucky!). In this example, all the glass was already out of the car because we just finished metal, body and paint work on this restorations. To properly install a vinyl top, all top trim, drip rail moldings as well as front and rear glass and related trim clips should be removed.

Vinyl tops arrive tightly folded in a box. It will need to "relax" before installation. 

Notice the extra material at all edges? Be sure you have a quality set of shears to cut the vinyl when it's time to trim, but before you start cutting proper test fitting and alignment is ESSENTIAL! Nothing worse than a vinyl top cut too short!