Missing or Rotted Out Running Boards?
No Problem!
Some jobs are more about function than appearance. This was a case of bringing a well used and much loved family car back to life. Our customer wanted their dad's 1940 Ford Tudor Standard Sedan back on the road for the family to enjoy together. When it arrived in multiple pieces, we knew there was a lot of ground to cover before the car would be road worthy, including replacing the original running boards and covers.
 |
| 1940 Ford Standard Tudor Sedan |
 |
| New metal running boards and covers received and test fitted. ALWAYS Test fit covers to the boards and boards to the car to verify fit. |
With the new boards and covers both received we can go ahead with verifying correct fit before we get to much further. ALWAYS test fit!!!! ALWAYS!
These boards were a good fit and within tolerance for adjustments at final fit up with fenders to the body of the car. When test fitting be sure to use and allow space for any welting or weatherstrip to be used. The metal boards were purchased as shown from Ebay (follow the link for the actual listing).
The new metal boards are made very similarly to the old ones, with one small area at the the outer lip that will need a small slice made in it to allow the cover to seat properly. These boards could be run "smooth" (without the cover) or covered with the original style cover as we are doing.
Once the rubber and primer is scuffed, clean it thoroughly with wax & grease remover. Once clean and free of dust set the outer lip over the metal, then apply glue to the rubber cover as well as the metal board covering ONLY the lip up to the curve. We set a clamp at each ends corner as well as a couple across the bottom edge to ensure proper fit (see photos below)
Once the cover cover glue is tacked off roll the cover over and secure at ends with clips as needed. Then apply the final 6-8" of glue to cover and metal board and tack off, then roll over cover to set in place.
The clamps on the edges just help keep it in place for final curing on sharper curves. Allow the glue to cure overnight for best results, then install on the car with appropriate weatherstrip and frame cushion as needed.
 |
| New replacement running boards |
First, we degreased the surface of the metal with wax & grease remover. Once clean, we used a DA and sanded as much of the surface as we could with 80 grit, then hand sanded the crevices to make sure the primer will have a good surface to adhere to.
With primer/sealer and paint on the top and bottom of the boards we can prepare the covers. Keep in mind that you will need to use contact cement to glue the covers on. We used a "hardened" primer and paint and know that it can be scuffed and will work well with the adhesive. ALWAYS test a small spot to be sure your paint will hold up to contact cement to avoid a big mess and major headache if the paint decides to lift because it reacts to the glue.
 |
| Prepping raw metal for primer and/or paint |
 |
| New running boards with 1 coat of epoxy primer used as a sealer and 2 coats of "Hot Rod Black" paint |
 |
| Bottom side of covers ready to clean and scuff |
 |
| Bottom side of 1 cover scuffed to allow proper adhesion with contact cement glue to running board body |
 |
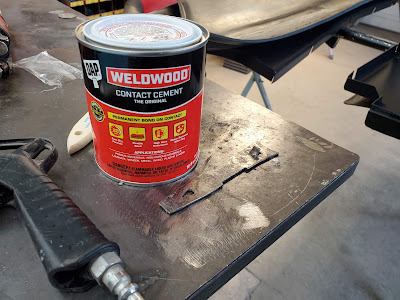
| Contact Cement |
 |
| Scuff the top side of the running boards to allow the glue to properly adhere to the surface of the board |
 |
| Cleaned surface with glue applied to the front edge fist, being sure to seat the lip on the bottom of the outer edge of the running board |
 |
| Clips help keep the running board cover in place |
 |
| Next section of glue applied to running board metal and rubber cover |
 |
| Let the glue tack off before covering to avoid bubbles and poor adhesion. The vapors need to be released into the air, not under the cover itself. |
 |
| Note the outer edge(left side of this photo) is hooked over the edge to keep it in place and allow proper fit alignment |
 |
| Cover glued in place |
 |
| Cover glued in place with clamps to cure edges |
The clamps on the edges just help keep it in place for final curing on sharper curves. Allow the glue to cure overnight for best results, then install on the car with appropriate weatherstrip and frame cushion as needed.
 |
| 1940 Ford Tudor Standard Sedan with running boards installed |


No comments:
Post a Comment
Leave your treadmarks: