April 4, 2022

1970 Monte Carlo SS Chassis: A closer look

1970 Monte Carlo SS

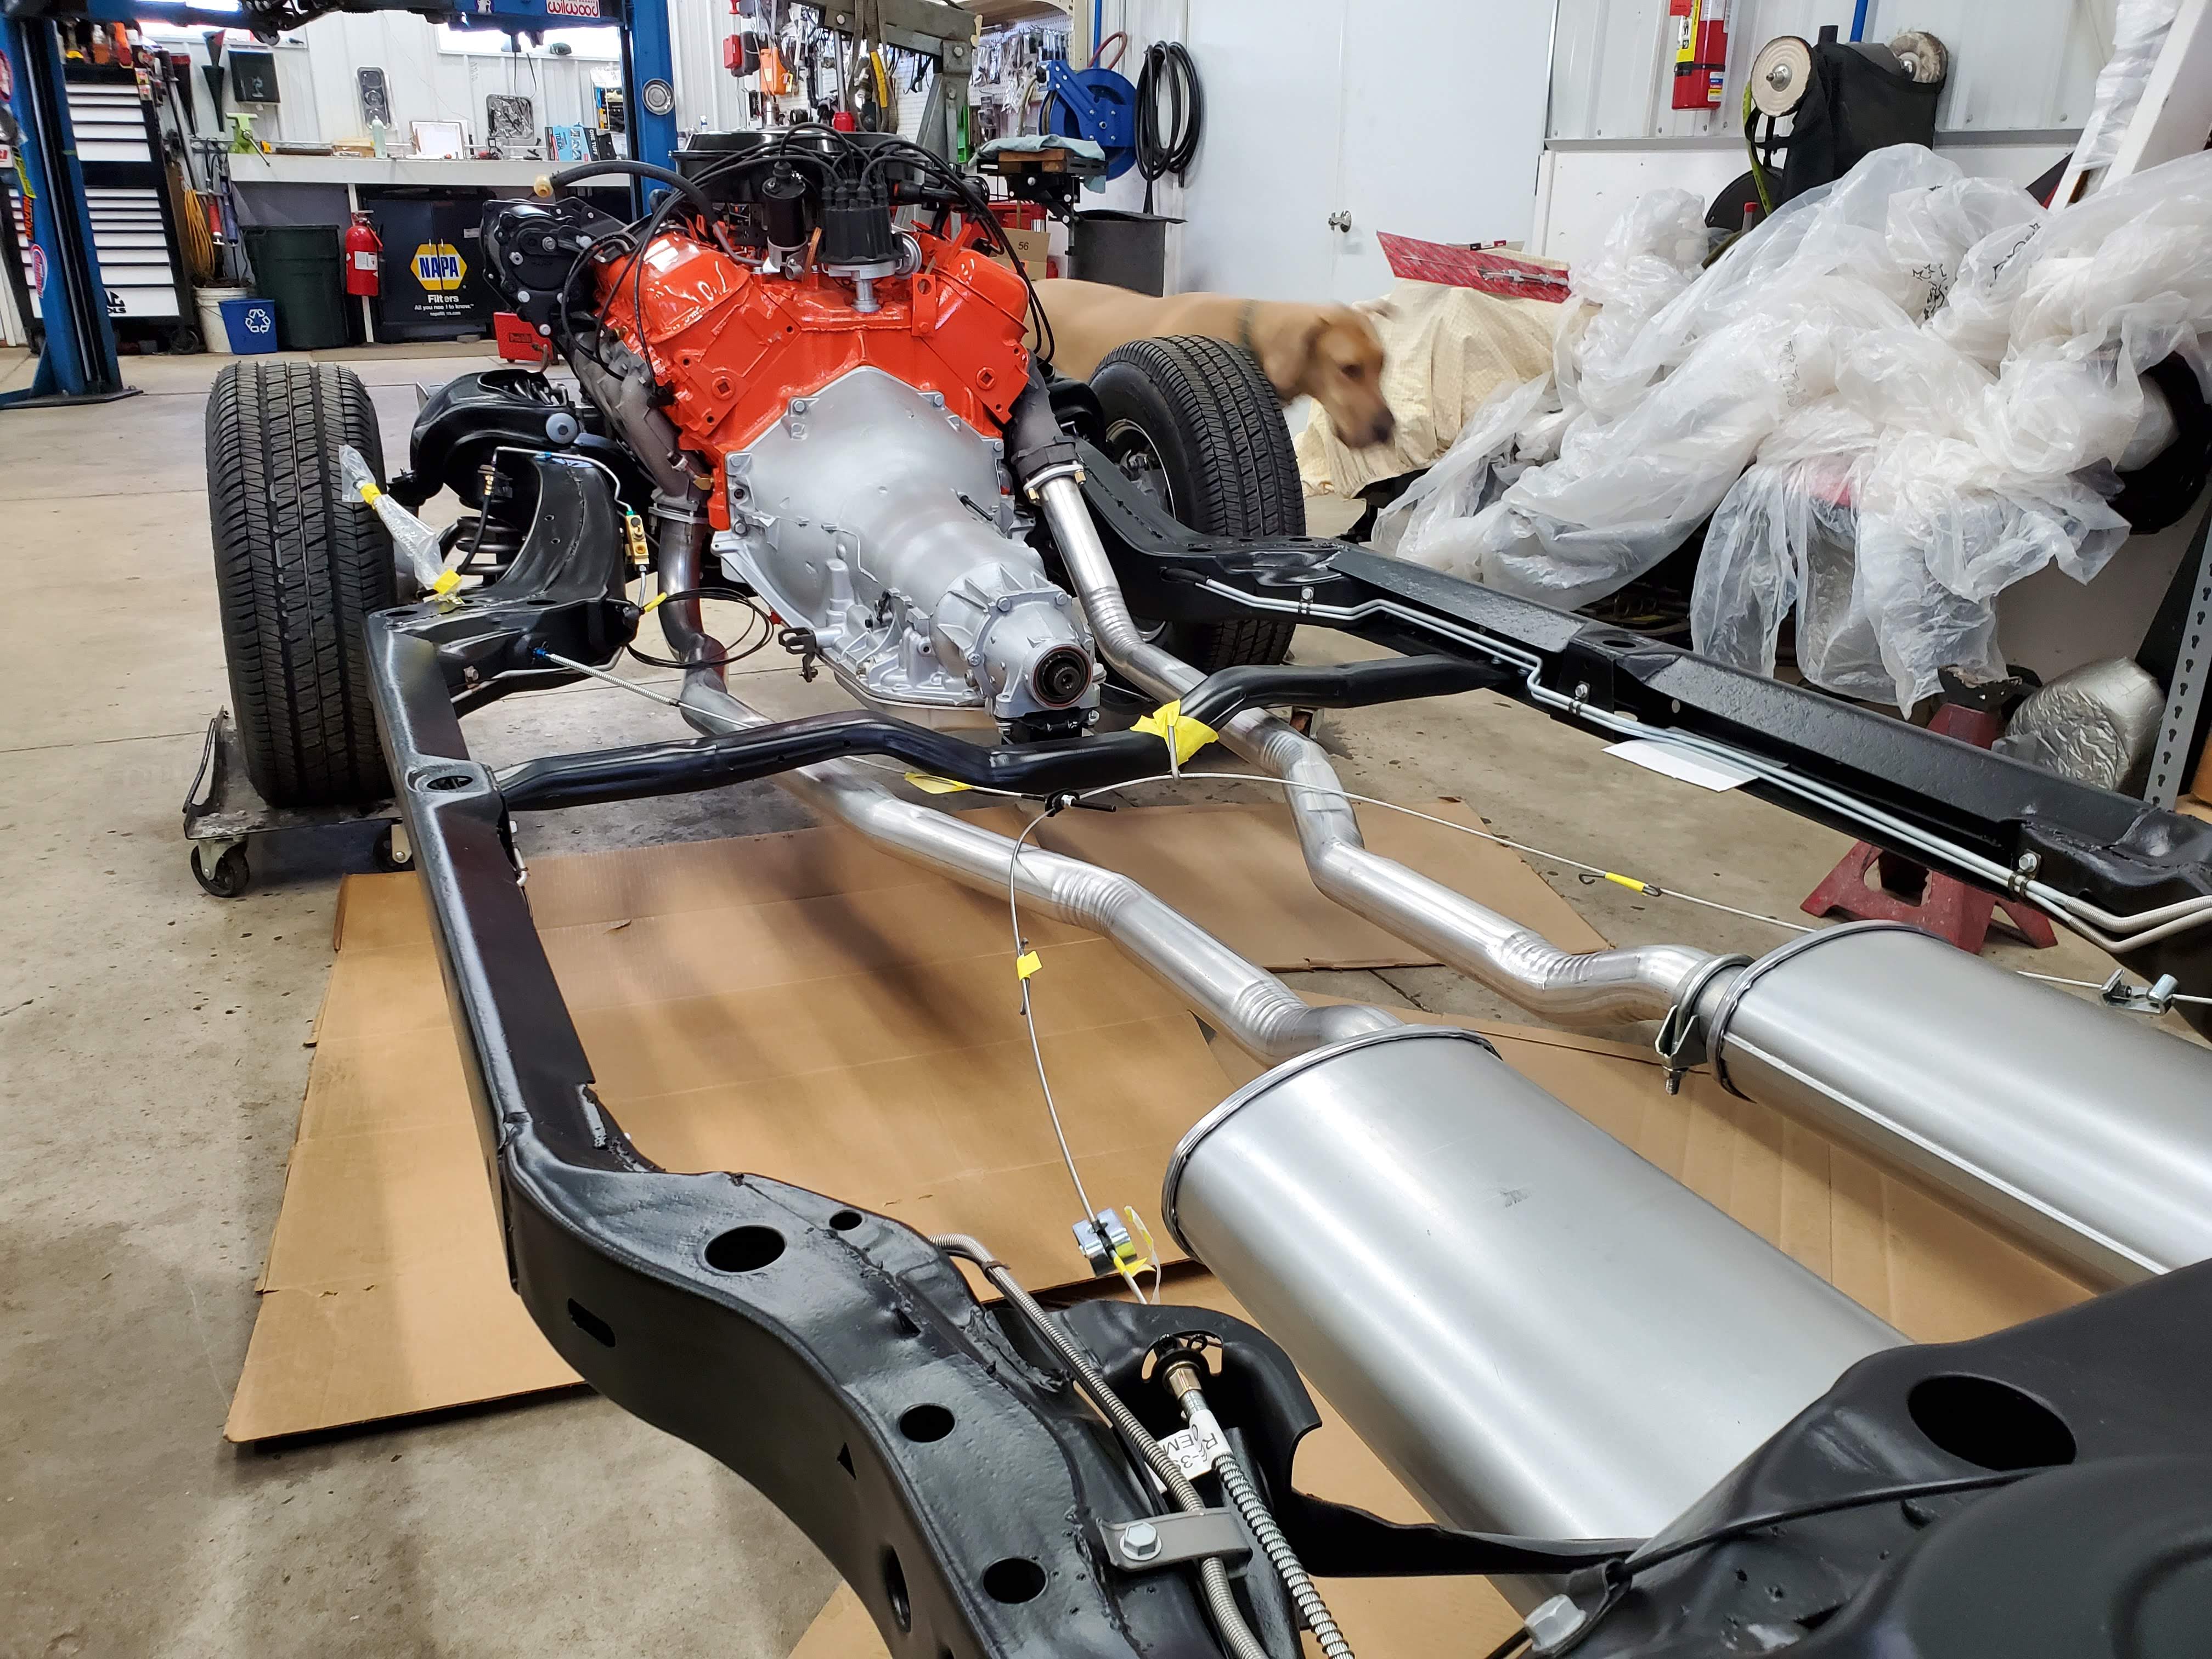
The details matter. Every last detail will be judged on the AACA circuit when this build is complete so we take every nut and bolt to a level rarely seen in automotive restoration. Perfection. 

Extensive research and hours upon hours of rebuilding and refinishing have gone into the parts on this chassis, from the frame clip colors, bolt head markings, and date codes to the color finishes and exhaust bends. Here's a closer look at the rolling chassis with up close photos featuring detail most people rarely notice. 


1970 Monte Carlo Chassis
1970 Monte Carlo SS 454 fully restored rolling chassis


December 7, 2021

1940 Ford Sedan Running Boards: Replace and Recover

Missing or Rotted Out Running Boards? 

No Problem!

Some jobs are more about function than appearance. This was a case of bringing a well used and much loved family car back to life. Our customer wanted their dad's 1940 Ford Tudor Standard Sedan back on the road for the family to enjoy together. When it arrived in multiple pieces, we knew there was a lot of ground to cover before the car would be road worthy, including replacing the original running boards and covers.


1940 Ford Tudor Sedan
1940 Ford Standard Tudor Sedan

1940 Ford Running Board
New metal running boards and covers received and test fitted. ALWAYS Test fit covers to the boards and boards to the car to verify fit.

With the new boards and covers both received we can go ahead with verifying correct fit before we get to much further. ALWAYS test fit!!!! ALWAYS! 

November 15, 2021

Rallye Gauge Replacement 1970 B-Body Mopar

1970 Rallye Gauge Rebuild with Tic Toc Tach

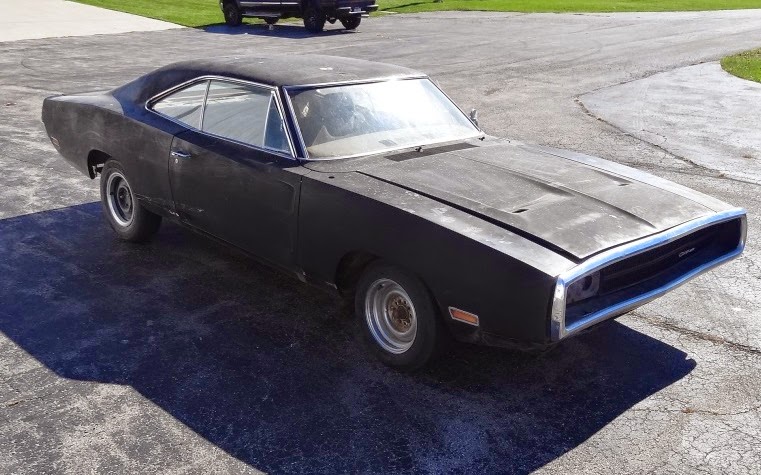
While we typically try to restore and re-use original parts, replacing the gauges and gauge face parts on this 1970 Dodge Charger R/T was a necessary upgrade. None of the gauges were operating or in restorable condition, including the tick toc tachometer. The dimmer switch was non-functional and there was an assortment of  "custom" additions to the dash area (random toggle switch and button anyone?) and critical deletions...like no heater box, radio, light switch, faceplate, glove box etc. Needless to say it was a mess. 
1970_Charger_Dash

1970_Charger_Center_Dash

In this case we removed the entire dash, steering column wiring and everything associated with the firewall as the car was undergoing a complete restoration. This makes it much easier to get the gauge cluster out. You can remove  the whole cluster from the front of the dash if you need, to but we'd recommend masking off the painted areas and dropping the steering column. Small hands help reach all the connections too!
1970_BBody_Gauge_Cluster
Continue reading to view the process...

February 4, 2021

Vinyl Top Installation Guide

Vinyl Top Installation on a 1970 Nova SS

 Step by Step Photos and Descriptions

Vinyl top installation doesn't have to be intimidating. Following a few basic steps and using the correct tools and materials can yield long lasting, show winning results like the one shown on this 1970 Nova SS. 

1970 Nova SS with black vinyl top


Freshly painted 1970 "4th Quarter Nova" SS

    Depending on your situation you may be replacing a top or installing a new one after fresh paint(we should all be so lucky!). In this example, all the glass was already out of the car because we just finished metal, body and paint work on this restorations. To properly install a vinyl top, all top trim, drip rail moldings as well as front and rear glass and related trim clips should be removed.

Vinyl tops arrive tightly folded in a box. It will need to "relax" before installation. 

Notice the extra material at all edges? Be sure you have a quality set of shears to cut the vinyl when it's time to trim, but before you start cutting proper test fitting and alignment is ESSENTIAL! Nothing worse than a vinyl top cut too short!

September 26, 2019

Mom's T-Bird Goes Rogue! 1959 Thunderbird SEMA Build

"MOM'S T-Bird" GOES ROGUE!

Flash back to 1961: "Pop's" is nervously deciding whether to purchase the highest priced car he's ever looked at, a 1959 Thunderbird, for his wife. It's not a new car, with a list price of about $3600 that is out of the question! But a 3 year old car is still a big investment.

It had low miles, was in good running condition and would be reliable for her and the kids to get around town, but still! That sticker price! 

It never would have occurred to him that some day the car will be worth MORE than what he paid. And why would he think that? After all, it's just a car! It get's you from point A to point B and the more you use them the more they cost you until they are worth less than the parts to fix them! Right? 

Luckily, Pop's found the gumption to make the purchase in 1961 becoming the 2nd owner of the Colonial White Ford powered by a 352 FE engine and C-6 transmission. He drove it home to give to his wife and thus, the '59 Thunderbird became "mom's car.


The family pictured in front of the '59 Thunderbird 
The kids are ready for Easter! circa 1965

Last tagged in Missouri in 1992, the car has been mostly summer driven and stored for the majority of it's life, which has saved most of the body of the car and made it into something of a time capsule. When removing the seats and carpet, some treasures from the past were found like Battleship  board game pieces in the back seat, a bouncy ball and a wrapper from M&M Lime Chewies (Curious? Here's more info at "in the 70's" ...fyi these later became Starburst!). 

1959_tbird

How did the car end up here at Driven?...

November 7, 2018

From Modest Driver to Mopar Dream Car: Building the 1970 Charger R/T 440

This 1970 Dodge Charger 500 parts car with a barely running 318 under the hood and a van seat for an interior, arrived at Driven Restorations to be re-born as a "Plum Crazy Purple" R/T 440-6

 October, 2014

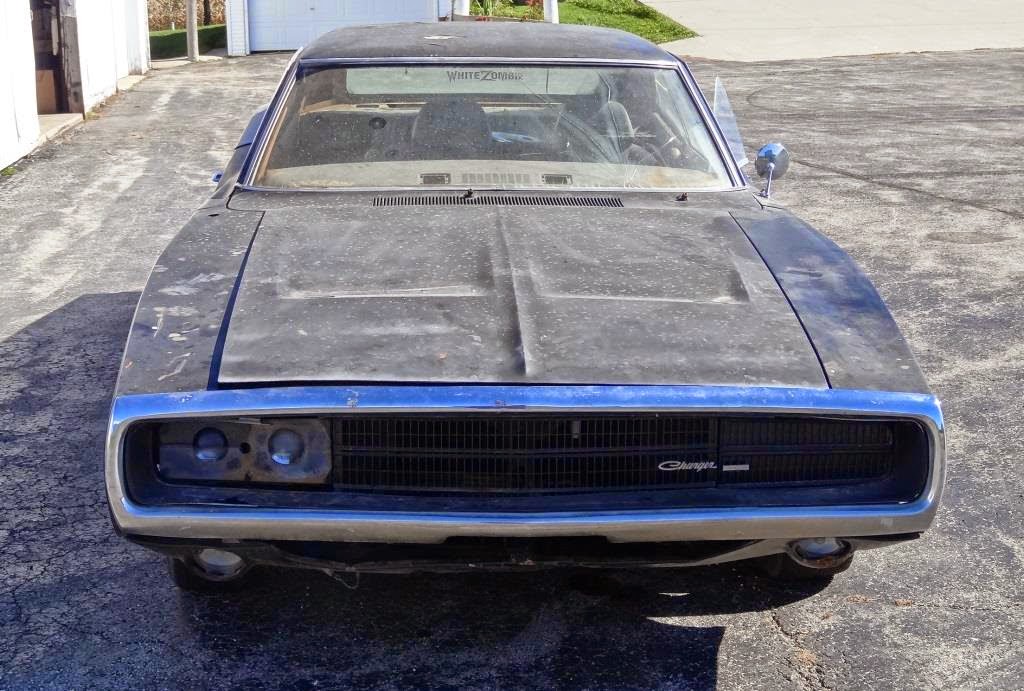
1970 Mopar Charger
1970 Charger arrived at Driven Restorations LLC
✯The Dream✯
This project started as a harmless conversation after we met the owner at an unrelated networking event. We said "classic cars", they said "Plum Crazy 70 Charger" and before you could say "R/T" the wheels were spinning and a build plan was in the works.

It took months to locate a '70 Charger within a day's drive of WI, needless to say there weren't very many Plum Crazy 440-6 Mopar's on the market. So when the owner's found a Charger in Arkansas, they moved quickly to get their shot at starting a MAJOR Mopar transformation. 


How major? 


The highlights include 318c.i. to 440 6-pack. Column shift to floor shift. Bare interior (with a van cargo seat) to an original interior with Leather bucket seats, console, A/C, and tic tock tach. Flat black 500 SE to Plum Crazy R/T package complete with a Dana 60 rear axle and black vinyl top
1970 Charger grill
1970 Charger 500 with a 318

February 19, 2018

Rebuilding the 1949 Buick 248 Straight 8 Engine

NEW PERSPECTIVE ON AN OLD ENGINE


1949 Buick 248 Straight 8 Rebuild

Most people have never seen inside a straight 8 engine. Although this isn't the first one we've re-built at Driven Restorations, we are the FIRST to dig into THIS particular ALL ORIGINAL Buick engine and the photos in this blog post let you see it first hand. 


It feels like opening a time capsule as we excavate to the depths of the engine, revealing parts that haven't seen open air since being pieced together on the assembly floor in 1948.  

RESCUED AT LAST!
The '49 Buick emerges from storage

Those very parts transported the Buick's family all over Oklahoma, coating her undercarriage in layers of clay and speckling her body with dings along the way. We've been told a few stories hinting that there may have been some shenanigans resulting in a couple of LARGER dings and one particular joy ride ended in her engine to running low on oil (was it low or empty?). The Buick's original 248 never ran the same again. It seemed her fate was to remain shoved, nose first, in the storage garage. 


Lucky for us, she was rescued.

 It's hard to believe, but members of the very same family who enjoyed this Buick for decades not only kept the car, but they've decided to honor her with a frame off restoration at our shop!

She will be GLORIOUS 

In the photos that follow, we take you from tear down through a fresh coat of paint as we meticulously re-constructed the heart of the '49 Buick, it's original 248 Straight 8. 

December 30, 2017

The Truth Behind the Trans Am Restoration

1977 Pontiac Trans Am Restoration: Metal Repair


At first glance, this 1977 Trans Am looks solid. It's well cared for, driven frequently (only in the summer), and any minor body damage or mechanical repairs were always done promptly. But there was a dirty little secret hiding under the whopping 5 layers of Brentwood Brown paint(see the video tour of paint stripping on Facebook)Old repairs left the rear wheel housing, trunk extension and quarter panel with rust eating away at the sheet metal.

In the photos that follow, we show you the rusty consequences of incorrect metal repairs and how we fix it at Driven Restorations LLC, using fresh sheet metal on this 1977 Pontiac Trans Am.

1977_trans_am

November 6, 2017

A closer look at the 1949 Buick Special Series 41 Sedan

There are numerous unique characteristics of every vehicle whether it's a classic car or your daily driver. It's not until decades later that any of these design details become very interesting. 
  • Power windows: Once an innovative luxury item and the reason your kids/grandkids don't know what "roll up the window" means. 
  • 2 sun visors: That was once an extra feature
  • Power steering: Now the only reason anyone can park in a city thanks to the design of the seemingly shrunken parking lots.
  • Turn signals: Can you imagine using hand signals on congested roads? Ouch!
Seems like a pretty basic list right? At first glance, it definitely is B.A.S.I.C. Things get's more complicated when replicating the early versions of these "options". Digging into the wire routing, mounting brackets, bulbs, wiring, wiper blades, specialty hardware, trim clips....well you understand. It's a different ballgame altogether when attempting to create a classic automotive time capsule that looks better than show room new. Oh and there's that minor detail of ensuring the old technology can safely carry people on today's busy roads.

Meet our latest challenge: 
1949 Buick Special Series 41, straight 8, 248 CI, 4 door sedan


1949BuickSpecial41
The hood latches double as decorative trim on either side of the hood. The telescoping antenna has a knob above the rear view mirror to turn it from it's resting position, laying on the center strip of the windshield, to it's "on" position, upright and 4 ft tall!

1949_buick_seat

We thought the interior of the car was tan. It appears to be tan. Even the headliner is tan! However, the body tag(discussed later on this post) and the smallest parts of the interior that escaped sun exposure tell us that the interior was in fact gray wool broadcloth with a dark gray metallic dash. The seat foam was so rodent damaged that the blankets on the seat are in place to cover the springs and the door panels are nearly missing all together. 

For the passengers, each seat has it's own ash tray and the glove box has a large clock front and center. Perhaps to allow well timed nagging of "are we there yet?" Sliding rear windows are a unique style and include a drain tube in the structure of the car to direct the rainwater from the window well , over the rear inner fender and to the ground through the rocker. 


January 15, 2017

Dyno Test: Re-built Small Block Chevy 350

This Chevrolet Small block isn't stock any longer!

Our customer wanted just over 400hp under the hood of his 1968 Chevy C10 show truck currently in our restoration shop getting a frame off restoration. We discussed the truck owner's goals, planned the build, had the block machined, assembled it, and painted it a high gloss Chevy orange. The results will get him to the shows in a hurry and he can do some burnouts on his way home!

A few details about the engine shown on the dyno in the video below:

  • Small block Chevy 350
  • Bored .060
  • Roller rockers
  • Roller cam
  • Aluminum intake 
  • Aluminum heads

Dyno test and block machine work performed at Advanced Engine Concepts in Green Lake WI.


Dyno test results: 432HP  460lbft torque
Chevy_350_rebuild
Assembly on the left, fresh paint on the right. The 350 looks great!
The SBC is now mounted on it's freshly refinished chassis and is backed by it's new 5 speed Tremec transmission with a more goodies on the way.

Small_block_chevy_350

Chevy_engine_350_rebuild
See more details and photos at the link below